You can create a Keyframe by double-click on a Track.
Hit the Backspace/Delete key on your keyboard to remove all selected Keyframes.
The Active Keyframe of a Track displayed with a thick white border. When a Track has an Active Keyframe, you will see its Time and Value on the Track Settings.
Tip: hit Tab key on your keyboard to jump to the Time and Value field from the Active Keyframe.
There are multiple ways to select Keyframes on a Track:

There are multiple ways to move Keyframes in Vezér.
You can drag selected Keyframes with your mouse. Hold down the Shift key to force them to move only one direction while dragging.
You can move selected Keyframes with the Arrow keys on your keyboard.
From Vezér 1.5.2, when moving OSC Float Value Keyframes with Up/Down arrow keys, the default movement value is always 1 percent of the Track min/max range.
If you hold down the SHIFT key while moving Keyframes the movement value will be always happening at the last fraction.
You can also move selected Keyframes by editing the Time and Value fields of the Active Keyframe. With there method you can use absolute and relative values:
absolute values: type the exact Time or Value you want to move to the Active Keyframe.
Move to 2. mins: 2:00:00
Move to 2. secs: 2:00
Move to 2. frames: 2
Move to value 27: 27
Move to negative value -27: (-27)
relative values: use a sign (+ or -) to move from the current position.
Move by 2 secs: +2:00
Lower the value by 27: -27
You can invert Keyframes on both Time and Value axis by typing i in the Time or Value field.
You can stretch selected Keyframes on the Time axis of selected Track, by holding down the Alt key while dragging the first or last Keyframe.
You need at least 3 selected Keyframes on the same Track to do stretching.
You can cut/copy/paste/paste in place selected Keyframes between Tracks, even between different Compositions. Pasting can be occurs in the playhead position, or at the original time of the Keyframe(s) if you use Paste in Place. Keyframes values will be converted to be compatible with the destination Tracks minimum and maximum values settings.
When you paste one Keyframe to a location where an other Keyframe already exists and that Keyframe is selected, the new one will replace the old one, instead of creating a new.
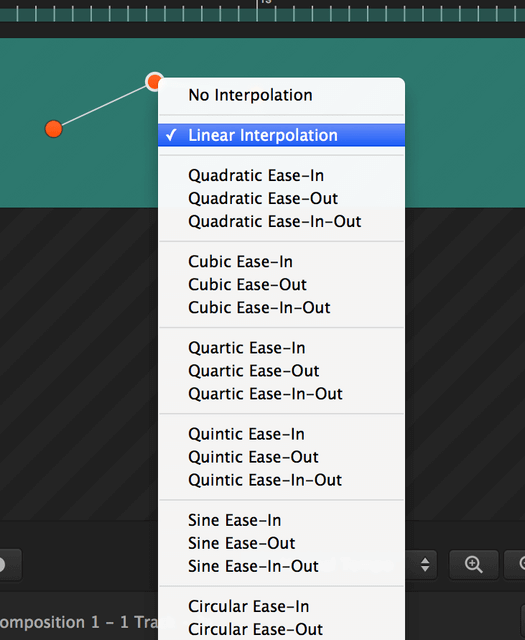
To change to interpolation of a Keyframe, Right-click on the Keyframe, and select the new interpolation from the menu. If you have multiple Keyframes selected, the selected interpolation will be applied on each.
Still stuck? How can we help?