Vezér has different type of Tracks (excluding Audio Tracks), each with different settings, but there are some settings which are the same:
If a Track has too much Keyframes in the current zoom level, it won't display all, but a kind of low-resolution view. In this case, you cannot create a new Keyframe, move or delete single Keyframes, but the whole group.
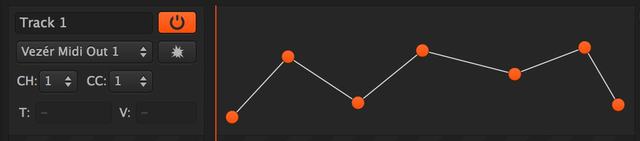
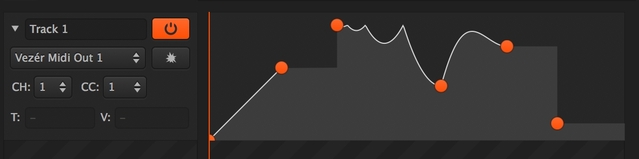
This kind of Track type is for changing a value of a single MIDI CC message over the time - like a fader/slider of a MIDI controller.
The extra settings of this Track type are the destination:
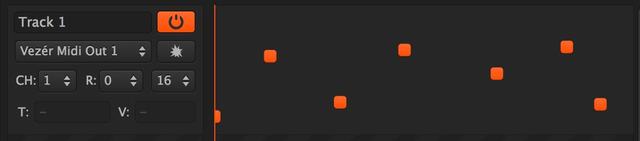
This kind of Track type is for triggering different MIDI Note messages in a specified range over the time - like buttons of a MIDI controller.
The extra settings of this Track type are the destination:
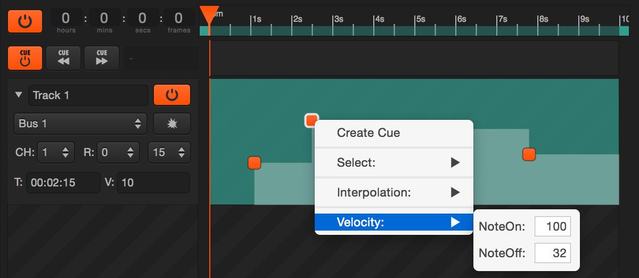
Custom MIDI Note velocities for Keyframes on MIDI Notes Tracks are also supported. You can set the NoteOn and NoteOff velocities by right-clicking on a Keyframe and select Velocity:
Velocities also handled from now when importing or exporting MIDI files, exporting to XML or recording MIDI - but with recording, Vezér skips NoteOff messages, so NoteOff velocity is needless here.
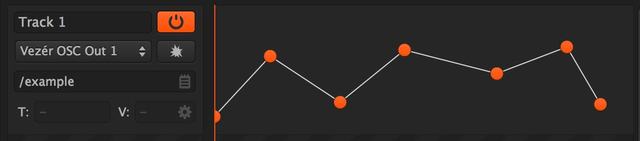
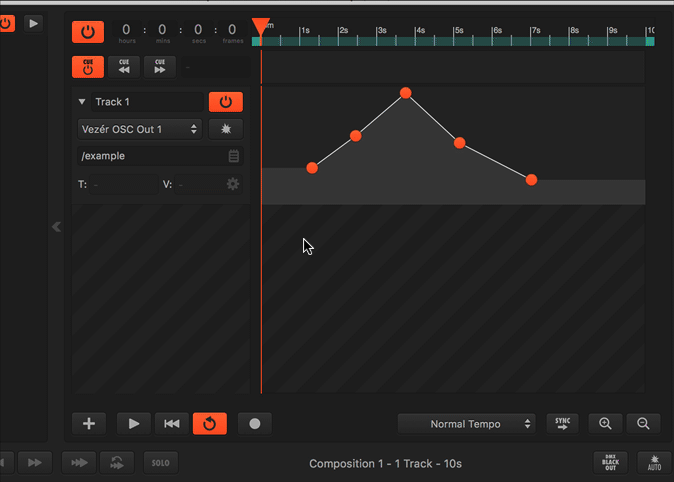
This kind of Track type is for sending OSC values.
The extra settings of this Track type are the destination:
You can set different options for each OSC Tracks, by clicking on the gear wheel icon on the right side of the value field, like:
There is also an option to send normalised floats only (0.0f - 1.0f) even if the Track has different settings - this can helpful while editing in case you need to send values between 0 and 1 to control a higher range of values - like pixels. Starting from Vezér 1.4.1 OSC Tracks will automatically reconnect to Bonjour OSC Targets, when the target appears again and the target had not been changed in the meantime.
Vezér 1.6 added an option to use 5 fraction digits with OSC Floats instead of the default behaviour (2 fraction digits). This option is automatically turned on when you recording OSC Floats.
There are 3 options you can select to setup how to deal with Keyframes outside of the new Min/Max range on OSC Tracks.
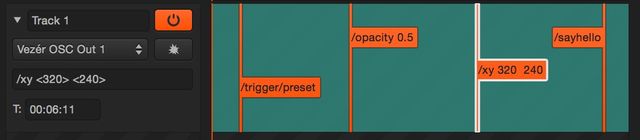
OSC Flag in a new kind of OSC based Track type, which lets you send messages with or without parameters with each Keyframe.
On an OSC Flag Tracks Keyframes are holding the address, and they don't have a value - so the big difference between other type of Tracks, you can send multiple different messages on a single Track. In a nutshell, OSC Flags sends different commands on Keyframes.
Because of the nature of this kind of Track, you cannot use interpolation between Keyframes, because Keyframes may have no hold any or the same kind of values. This also means the optimised value sending has no affect on this kind of Tracks.
By default, Flag Keyframes do not hold any value, and they have no field for editing or adding a value to them - but in case you want to send values to, you can multiple fixed arguments just like any kind of OSC Tracks.
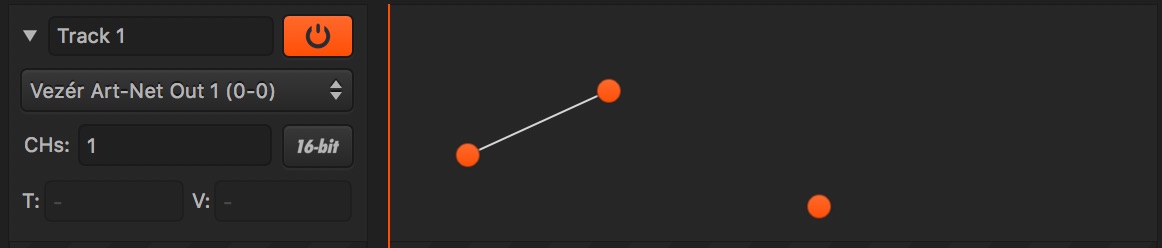
The Art-Net Value type Tracks are supports to send value to a specific DMX channel (1-512) on a specific Universe(and Subnet), and they work like the other Value type Tracks, MIDI CC and OSC Value.
Art-Net channel settings on both Value and Color Tracks has been changed in Vezér 1.6, and the channels field of this type of Track now accepting multiple values. Now you can use "," characters between channel numbers to define multiple channels, and the "x" character for repeating channels.
Examples:
Regarding to this change, the Art-Net repeat field has been removed.
Channel number in rendered XML files looks exactly the same as on the interface.
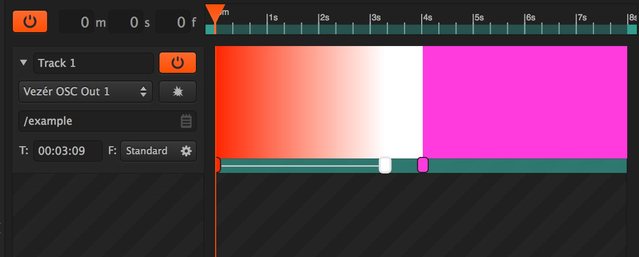
Vezér supports Color type Tracks, so you can send Color data to OSC or Art-Net destinations. The visual representation of this Track type is a bit different then the Value type Tracks - including Keyframes - since this kind of Tracks need to represent the color values over the time.
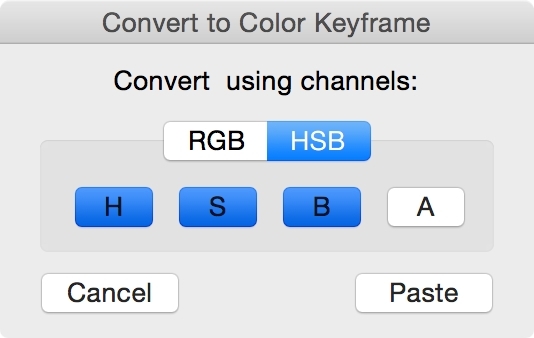
Keyframes of Color type Tracks are a bit different then other Keyframes, since they need to represent their color values.
When you copy-paste keyframes between Color type and Value type Tracks Vezér acts differently, since the data to creating keyframes more or less then needed. There are two cases in this circumstance:
Vezér support sending color data with OSC, in multiple formats.
There are a couple of settings available to define how Vezér should send the color data to the OSC client.
When you create an OSC Preset from an OSC Color type Track, the Preset will also store and restore the OSC message format you set on the Track.
Vezér 1.7 added support for adding multiple fixed arguments to OSC Color Tracks.
However, the <$> parameter is not supported. The value of the OSC Color Track always sent as the last value.
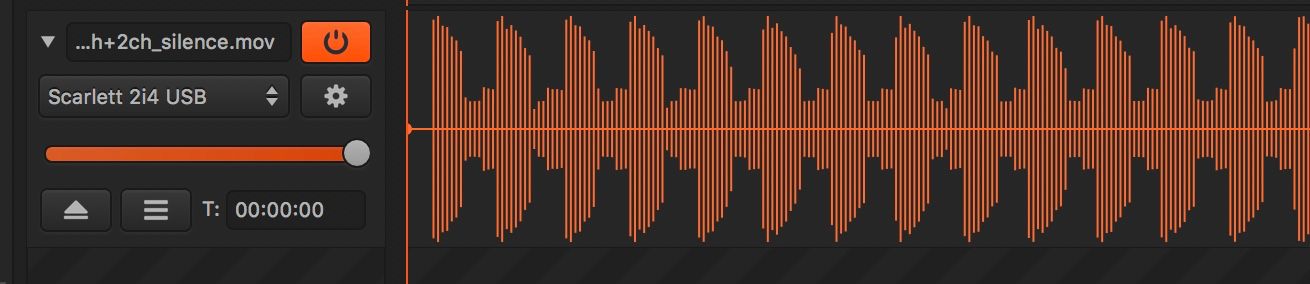
Audio Tracks are different than the other Track types, since an Audio Track does not hold Keyframes data, but an audio file.
To create an Audio Track you can
The supported audio file formats are
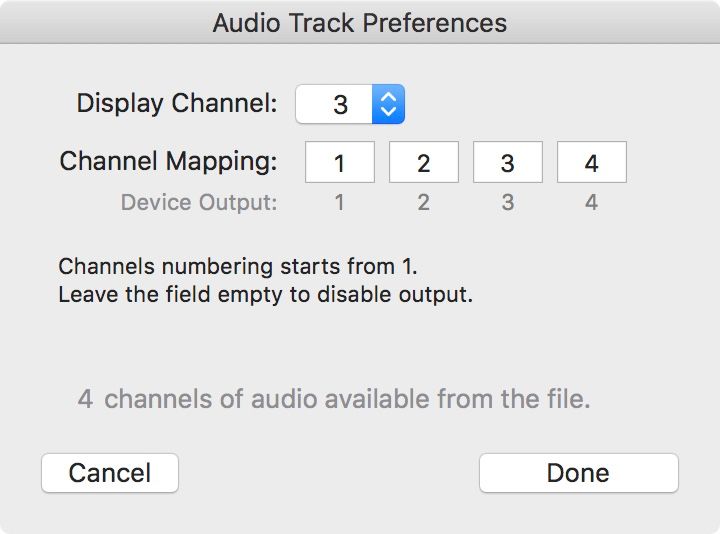
On the Display Channel popup you can select which audio channel from the file should be used to display the audio waveform - also this channel will be used for the Audio to Keyframes feature.
You can also set the Channel Mapping here too in case you select an other output than Project's Default.
There are two options available to move the audio file on the Track, so you can set the start point of the audio on the timeline:
You can type the start time to the Start Time (T:) field.
This field supports both absolute and relative positioning like keyframes.
To drag the audio by your mouse you need to select the whole audio file (waveform) first, either by doing a double-click on the Track, or hit CMD+a (Select all) on the track.
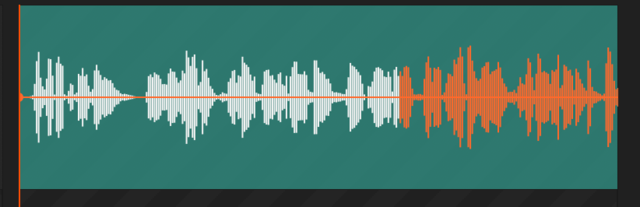
To convert the current audio data to keyframes, select the audio track and drag your mouse around to select the part of the audio waveform you want to convert to keyframes, then hit CMD+C to copy the Keyframes to the pasteboard, and hit CMD+V to paste them to a Track other than an Audio Track. You can start copy-paste from the Edit menu as well.
To select the whole Audio Track, for even dragging the Audio Start point on the timeline you need to do a double-click on the waveform, or use CMD+A to select the whole Track.
Filtering does not affect audio playback, but the Convert Audio to Keyframes feature. To apply filtering, you can click multiple times to the Filtering button, to achieve Highpass, Mid, and Lowpass filtering. Cutoff frequency can be set up by right-clicking on the Filtering button.
If you want to force Vezér to use relative file paths for audio files, place your audio files next to the project file, or into a folder called /files/ which is next to the project file. This way, Vezér will use the relative path of the audio files, so you can safely move your project to an other computer or to different location on the current hard drive.
Vezér 1.6 added support for sending and recording 14-bit MIDI CC messages.
14-bit MIDI is the Continuous Controller feature of the MIDI specification, where any of the first 32 controls (MSB - CC 0-31) can be optionally paired with a control offset 32 higher (LSB - CC 32-63) and using them as coarse and fine parameters of a 14-bit value, and this way allow using 16,384 possible values instead of 127.
This means, the 14-bit option is only available when you are using one of the first 32 CCs (CC 0-31).
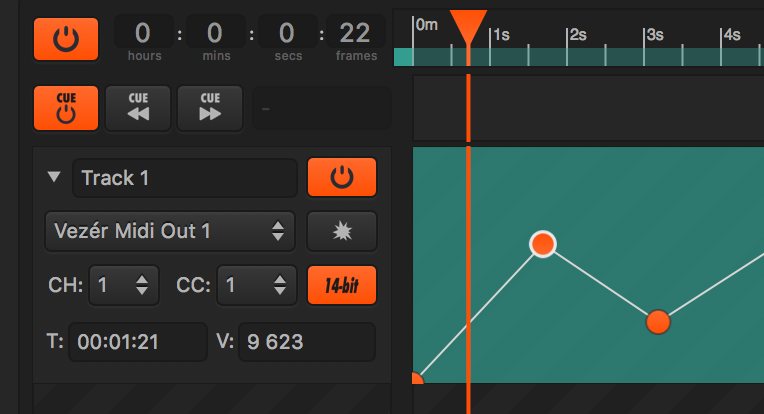
Recording of incoming 14bit MIDI CC data is also possible. However its impossible the detect if a CC values is 14 bit - since a 14bit CC no more than 2 normal CC values merged together - so you need to mark the starting CC (the MSB) to excepted as a 14 bit values in Vezér's MIDI Record Filtering Preferences. Obviously this option is only available for the first 32 controllers (CC 0-31).
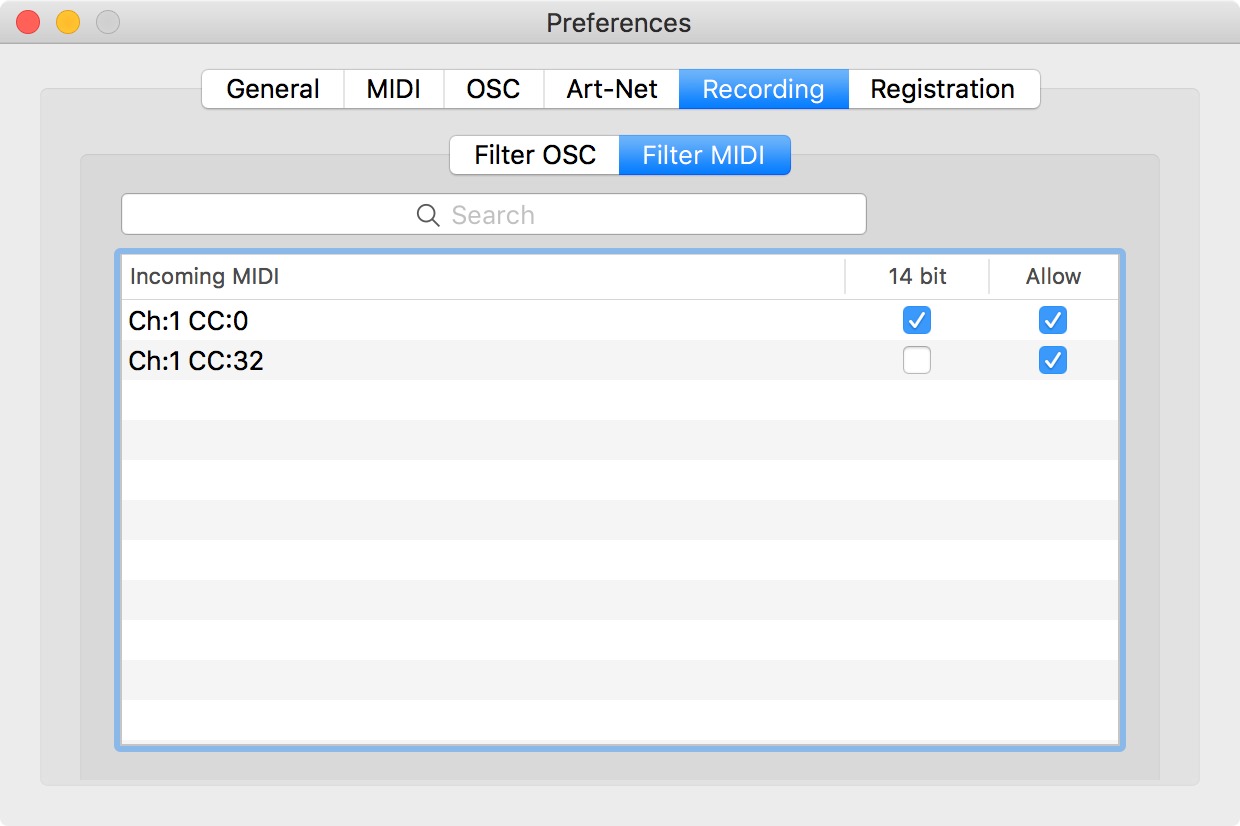
14bit MIDI Tracks writing their CC number in the exported XML with the "cc-msb" and "cc-lsb" keys.
Vezér 1.6 added support for sending 16bit Art-Net values by merging two consecutive DMX channels. This option is available for both Art-Net Color and Value Tracks.
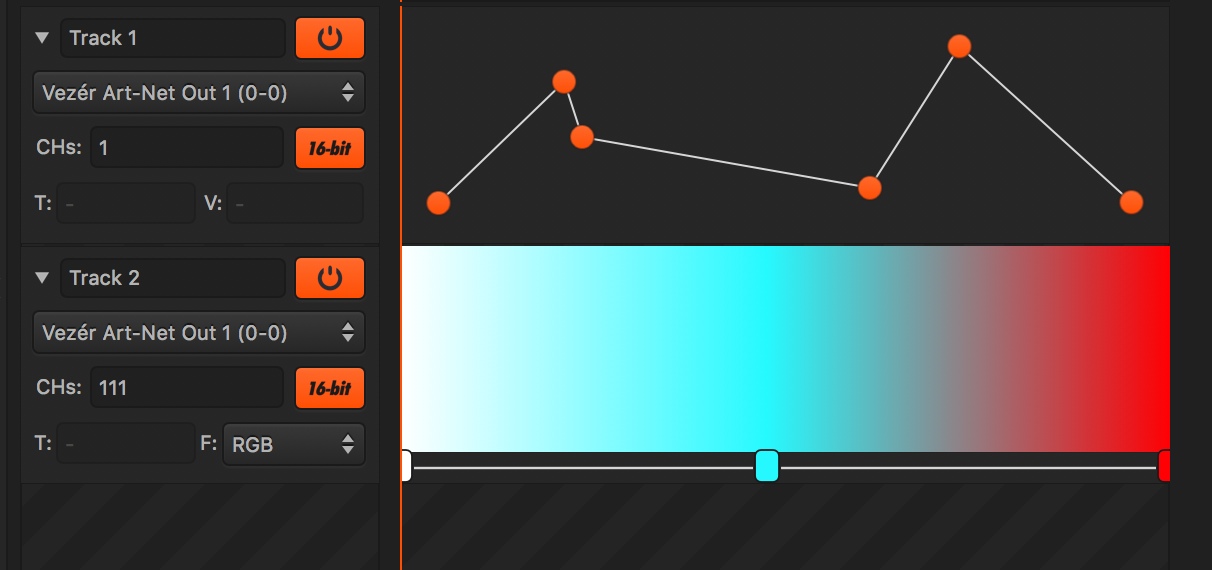
Recording of incoming 16bit DMX data is also possible. However its impossible the detect if a DMX channel value is 16 bit - since a 16bit DMX no more than 2 normal channel values merged together - so you need to mark the starting channel (the MSB) to excepted as a 16 bit value in Vezér's Art-Net Record Filtering Preferences.
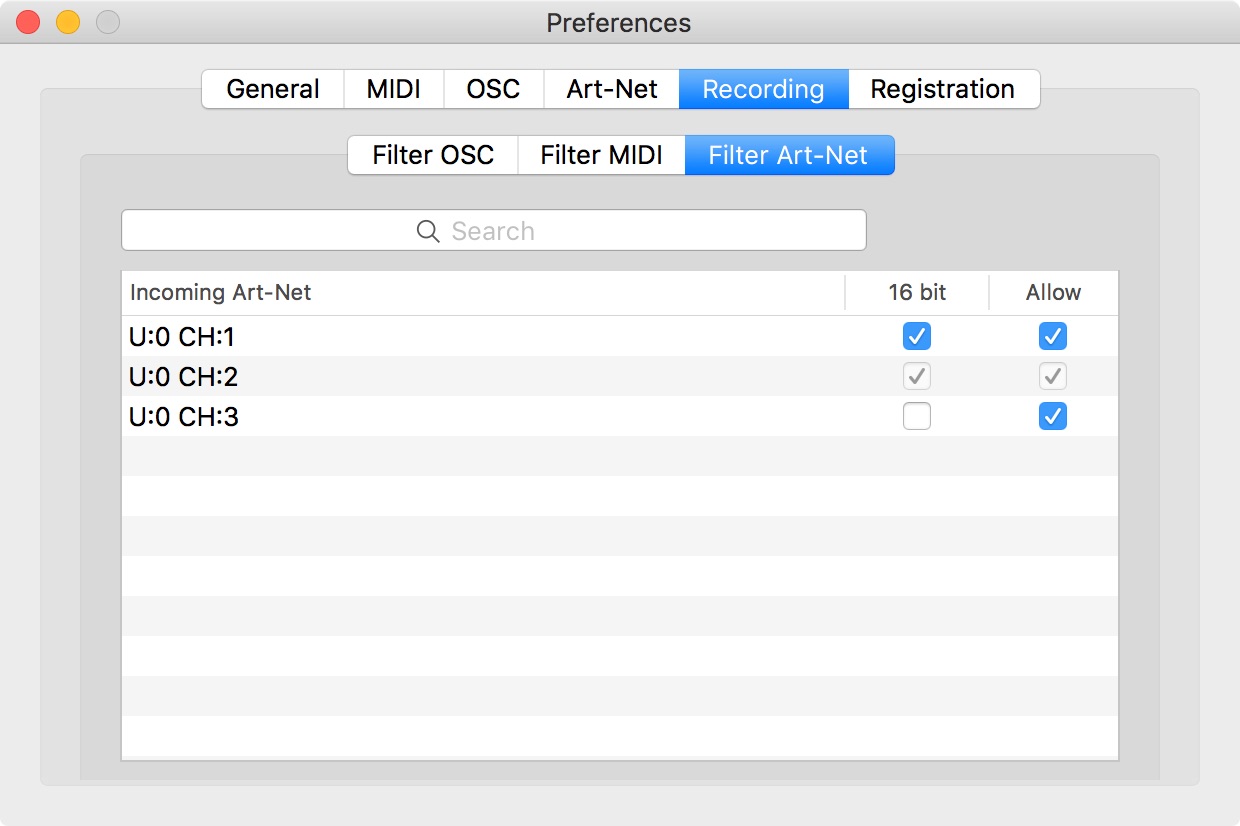
Art-Net Tracks rendered to XML now contains a "resolution" key with the value "8bit"/"16bit".
With the Sorting Tracks feature, you can sort Tracks in the current Composition using one of the following options
You can also switch between ascending or descending sorting order.
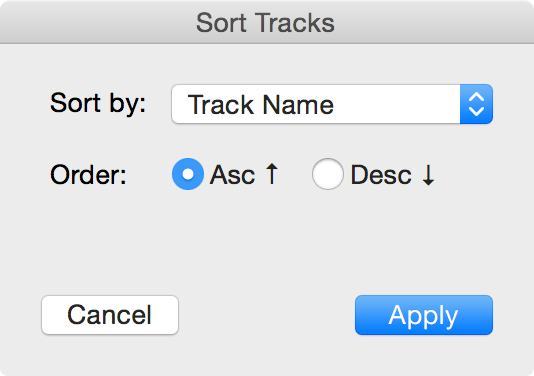
The Sort Tracks feature available from the Composition menu, or with the following shortcut: CMD+CTRL+S
With the Display value flow on Tracks enabled, Tracks will draw their state of value processing in addition to the interpolation curves. This could be handy when you use Keyframes without interpolation, or when you zoom into a Track portion that does not display any Keyframes actually, but you need to know the position of the last Keyframe.
Displaying the value can be enabled from the Project menu, and of course you can set its global behaviour state in the Preferences.
Tracks are being processed at the resolution of Composition FPS - just like in any other timeline based software.
However, there are some things you might need to know:
Normally, Vezér only processing Tracks when the Composition is in playback, except a few exceptions:
First, make sure you don't have any Keyframes selected on the Track you want to remove - or only the Keyframes will be removed -, then select the Track you want to remove by clicking on it, and hit Backspace/Delete key on your keyboard.
Yes, by holding down the Alt key on one of the selected Tracks, and you can simply drag and drop selected Track(s) to an other Composition in the Compositions List. This action will move the Track to the other Composition.
If you want to do a copy, first you need to duplicate the Track (see the Project menu), then you drag and drop the copied Track to the other Composition.
Yes, by holding down the Alt key while dragging on selected Tracks.
You can lock selected Tracks with Project menu - Lock selected Tracks command. The selected Track(s) will turn into grey, all of the Track preferences and controls will be disabled, and the Bang button(s) of those Track(s) will turn into Unlock button(s).
You can mute a Track by turn off its 'power' button.
However, if you do a right-click on a that button, you will find a menu where you can select
To copy/paste Tracks within a project you just need to select the Tracks you want to copy - just the Track, not the Keyframes - then paste.
You can also duplicate from the Composition menu.
Still stuck? How can we help?