This section provides tips and tutorials.
OBS Studio is a free and open source software solution that takes audio and video sources from various sources and transmits it to online streaming services (or with the NDI plugin on the local network).
There are multiple ways to connect Mitti to OBS. The easiest option to enable Mitti's NDI Output and use it as a Scene source in OBS - you need to install the NDI plugin for OBS to be able to get NDI feeds as sources.
But there is an other option if both software running on the same computer, that minimizes latency and requires less resources - but needs a little more to setup.
Syphon is a technology for sharing GPU frames between application, and has built-in support in both Mitti and OBS.
In Mitti, there is nothing you need to setup after launch, Mitti is automatically manage a Syphon server for transmitting video data if clients are connected.
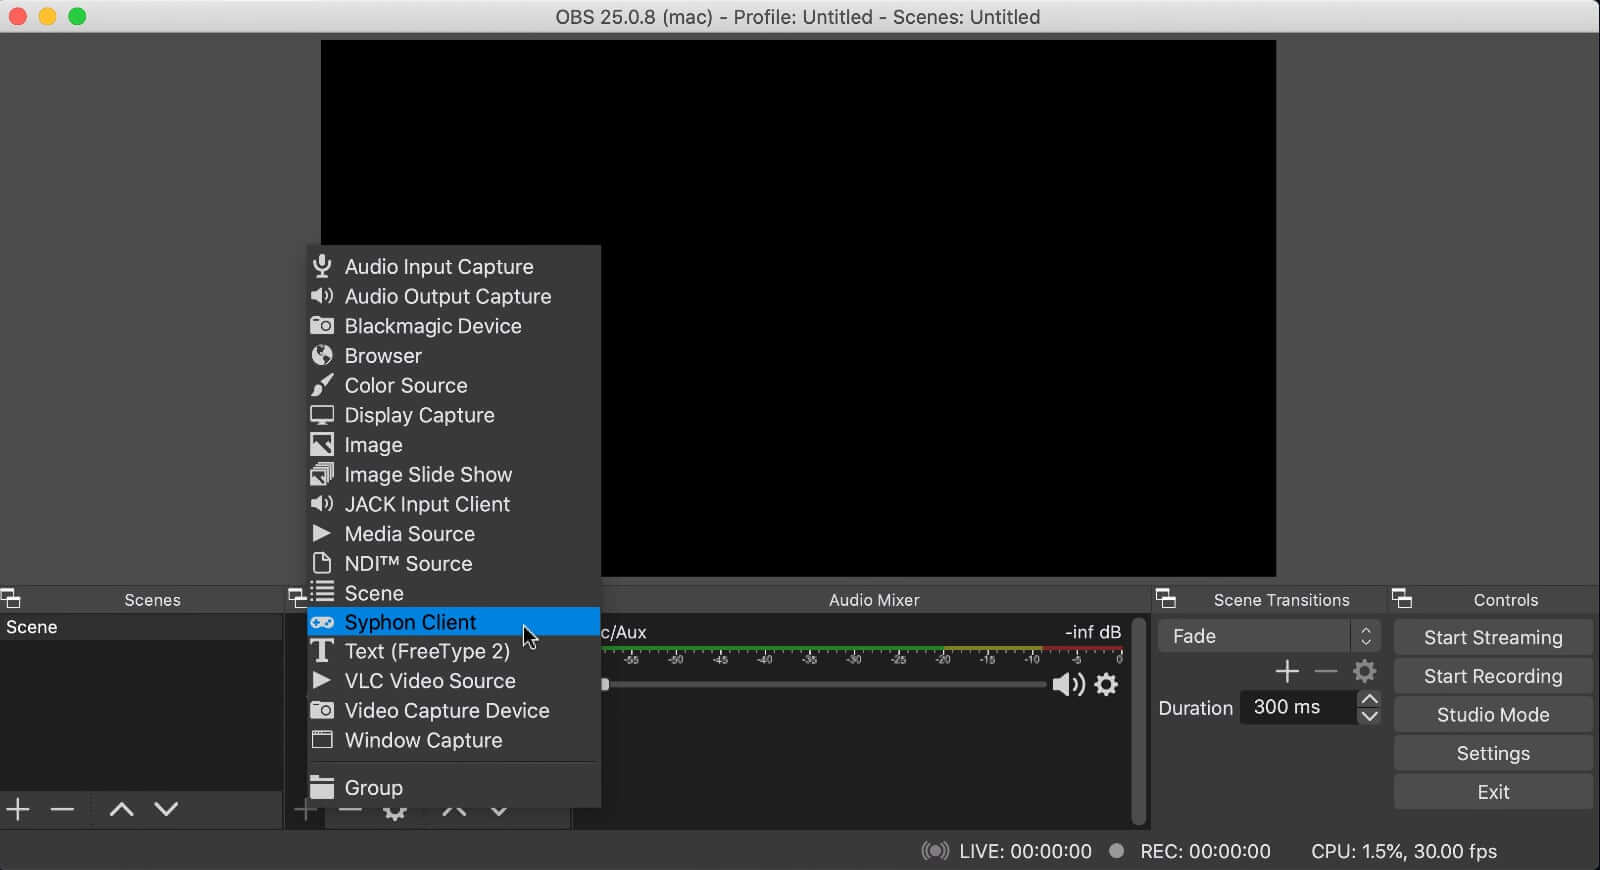
In OBS, create a new source for your Scene, and select Syphon Source from the list.
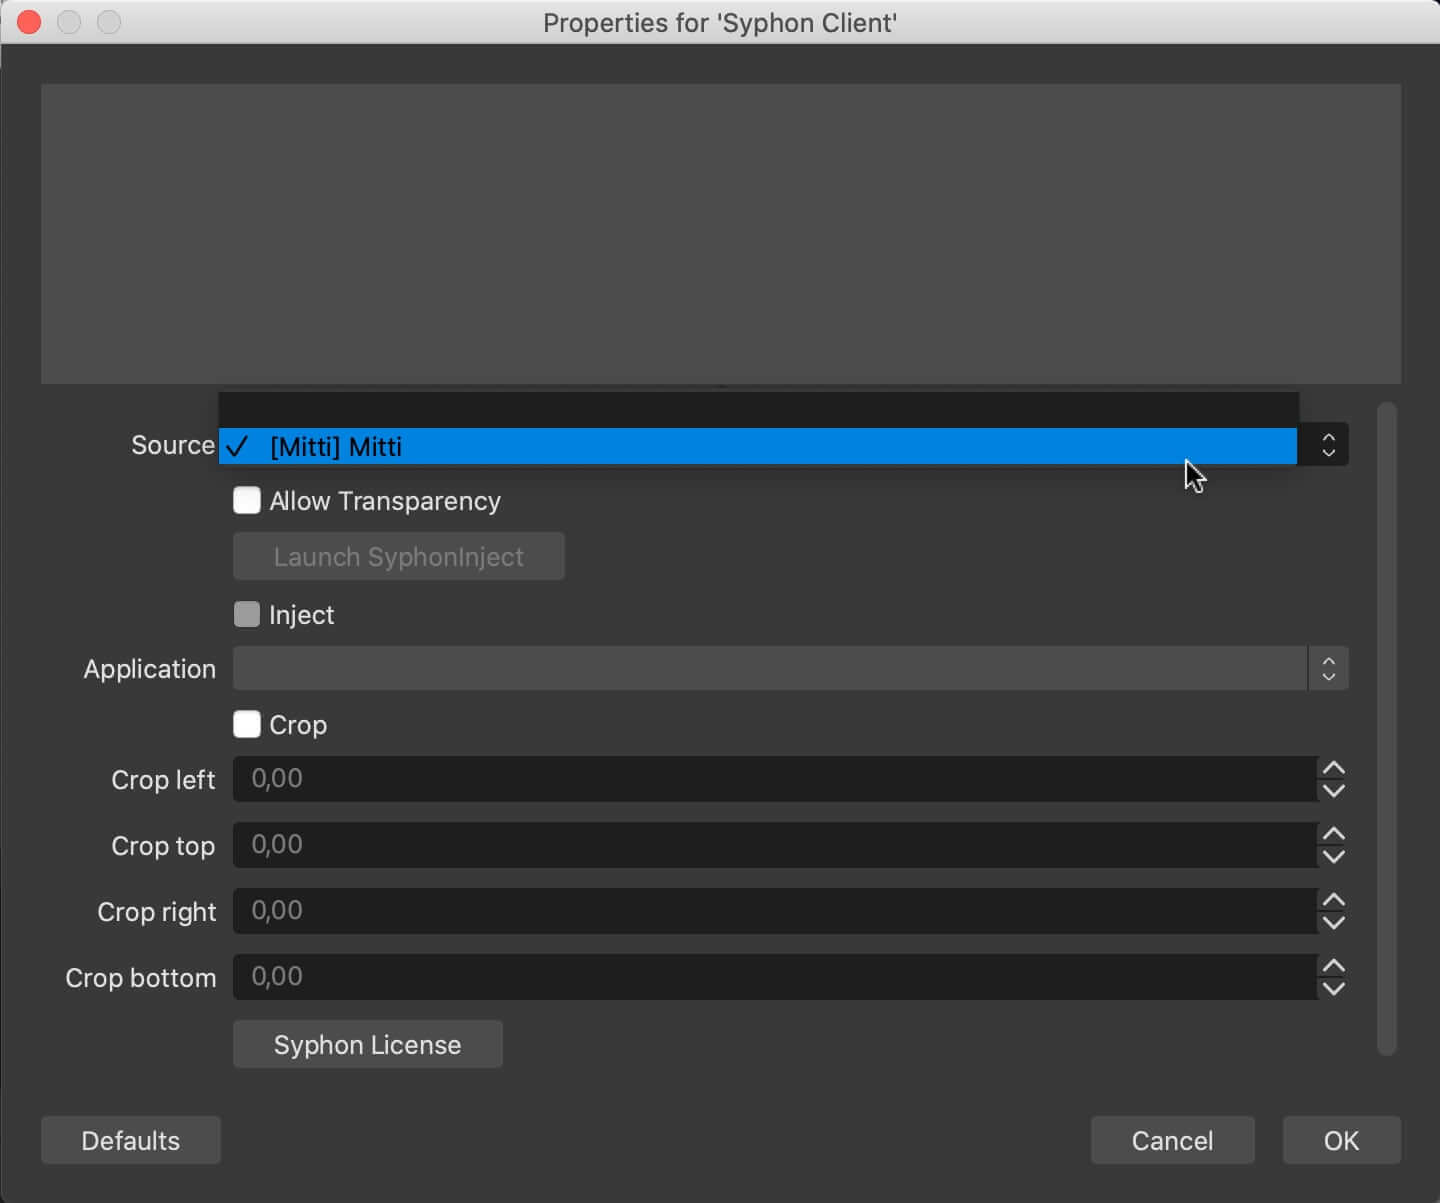
After you created the source, select it and click on the little gear icon to open the sheet where you can select the source for the Syphon Client - select Mitti from the list.
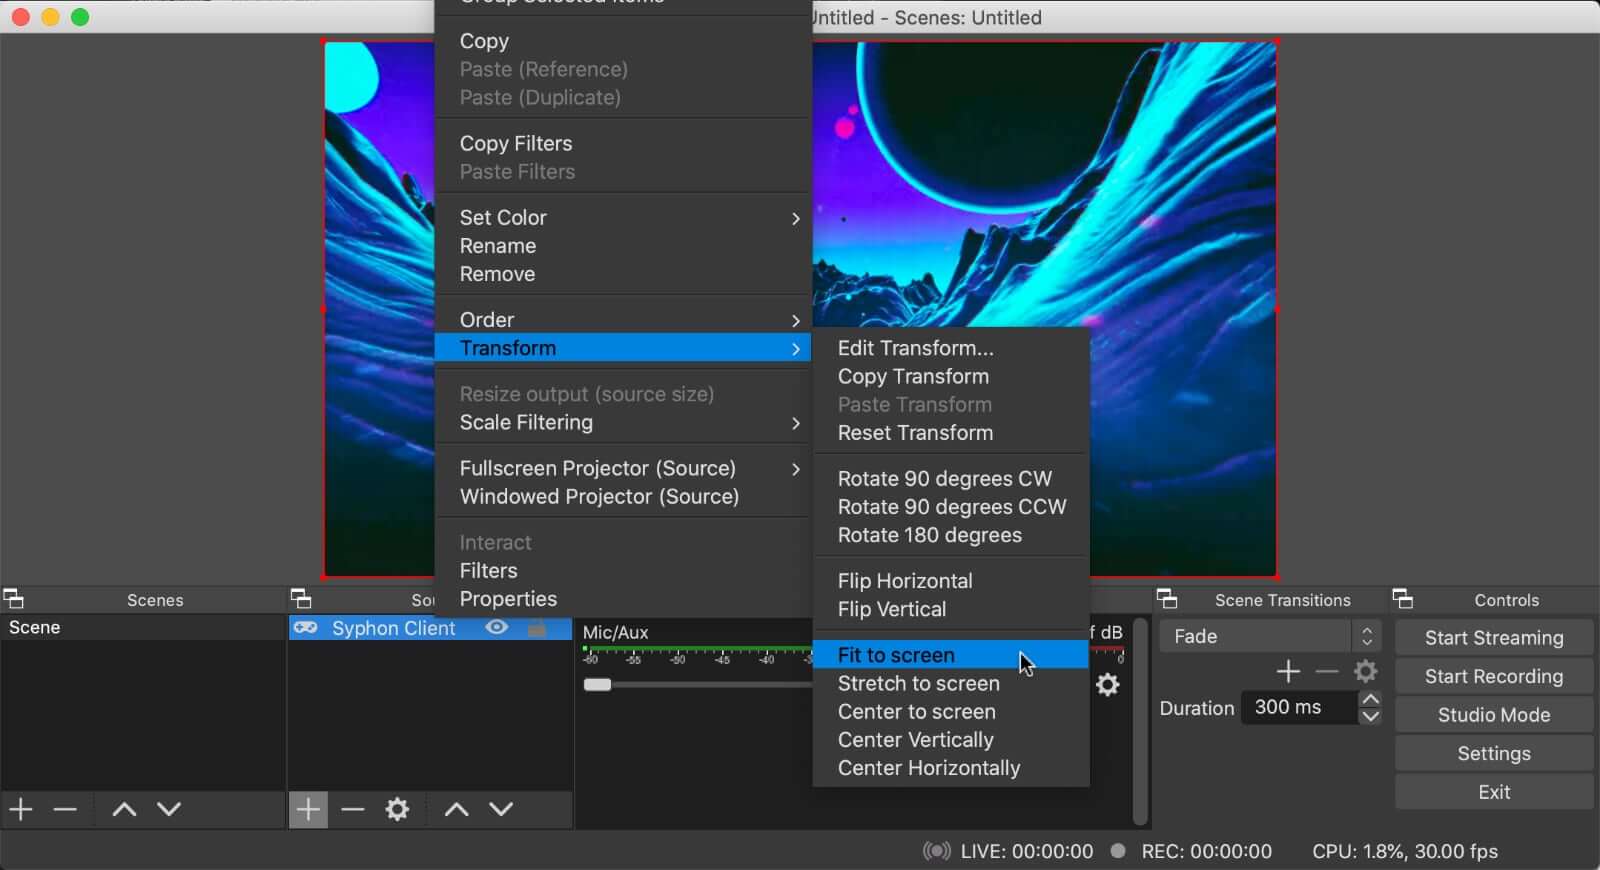
Great, that is all for sending video from Mitti to OBS. But here is a tip if the size of the video does not fit in OBS's canvas: right-click on the Syphon Client, select Transform then Fit to screen.
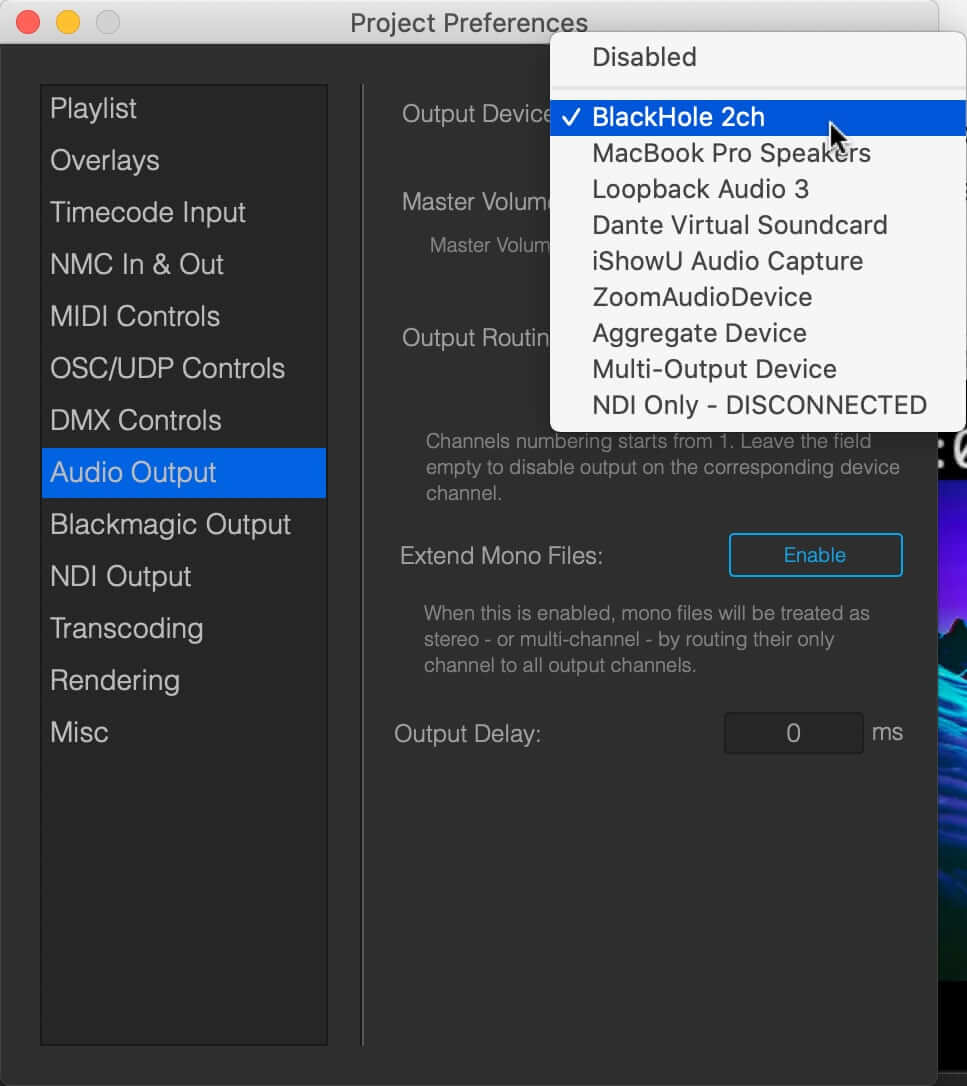
To send audio from Mitti to OBS we need to use a virtual audio driver, which can act as an audio destination in Mitti but act as an audio source in OBS.
Our recommendation is the Blackhole app because it is easy to setup, works well on macOS 10.15 Catalina and it is free and open-source.
Tip: For more advanced routing option, you need to check out Loopback, it is awesome.
So, once you downloaded and installed Blackhole, go to the Audio Preferences in Mitti and select it as the output device.
Once you done with that, get back to OBS and create a new Audio Input Capture for your scene.
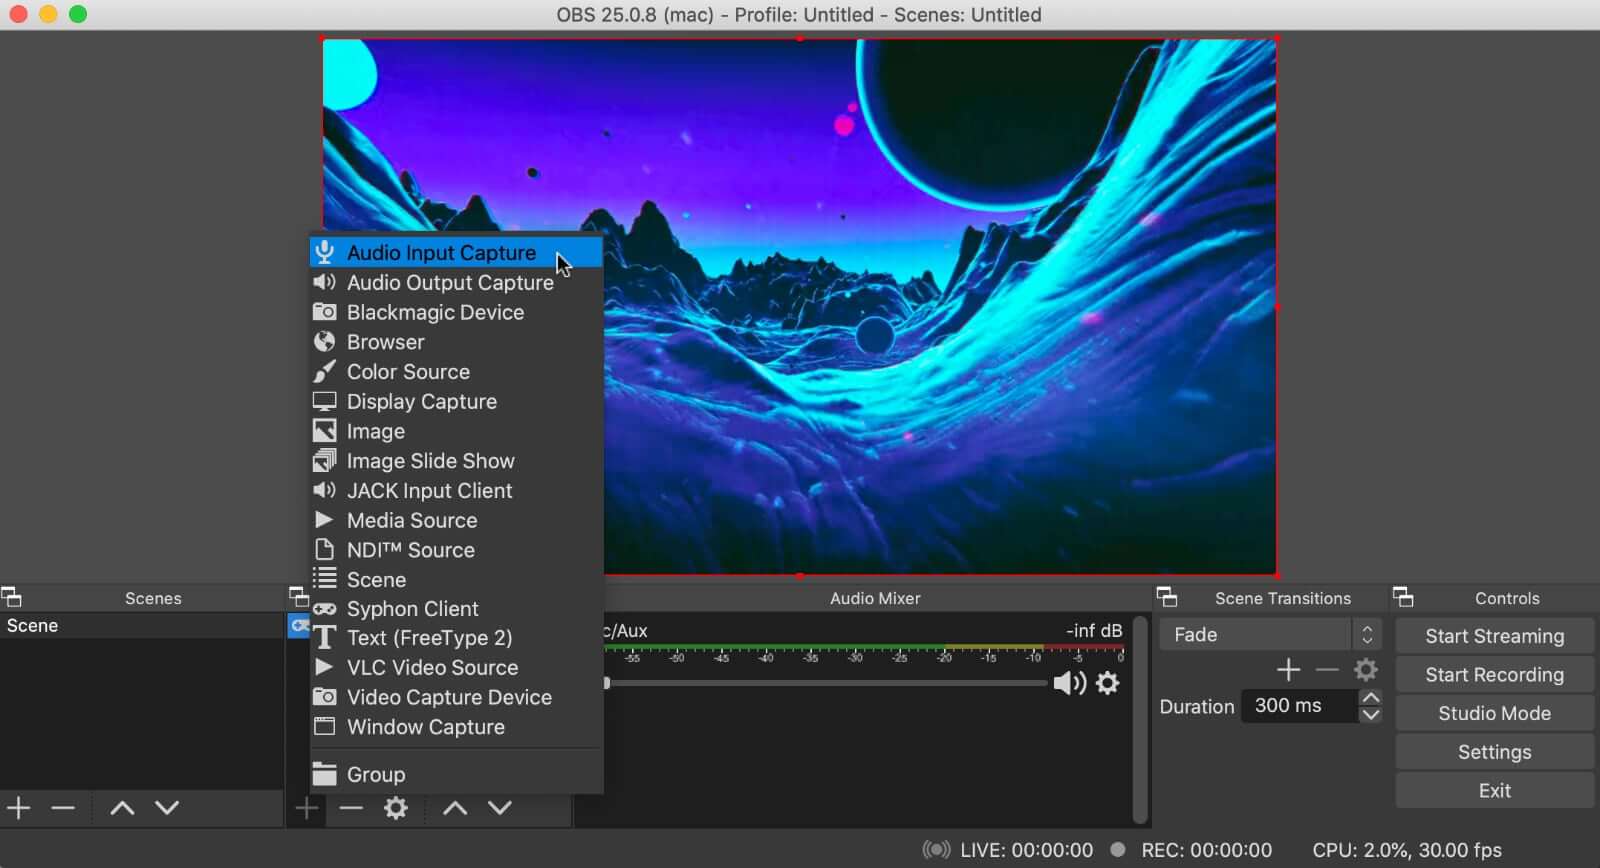
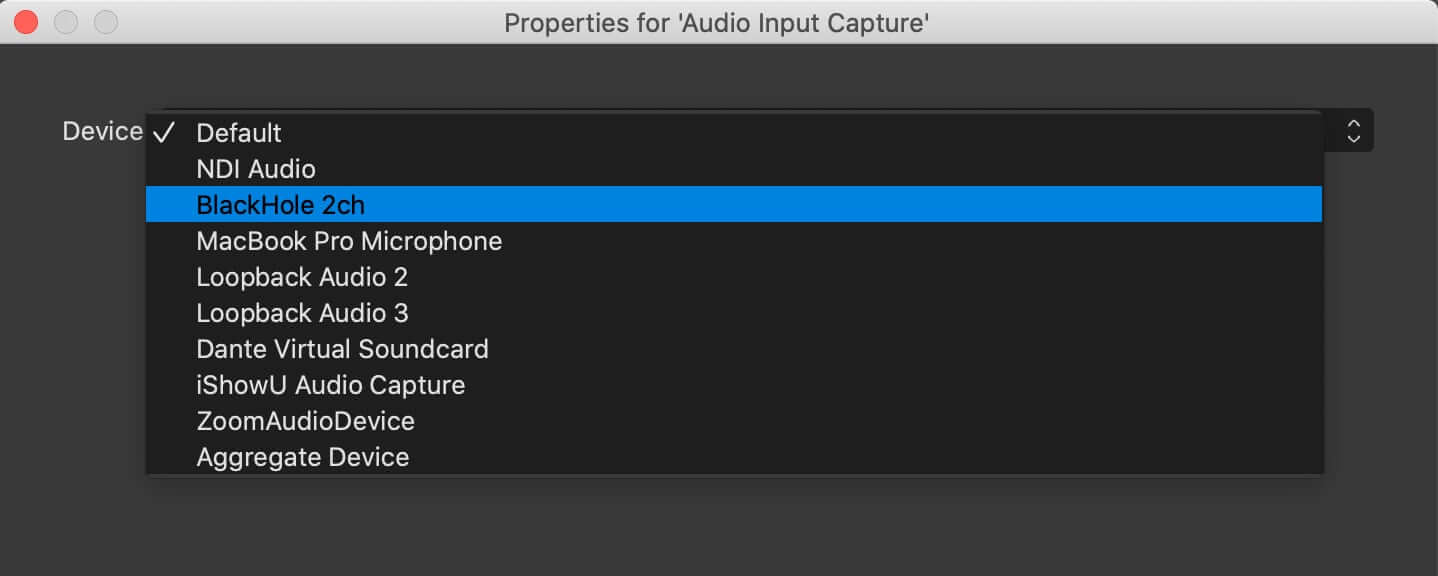
When it is done, OBS will ask for the source for the input, just select Blackhole again.
That is all!
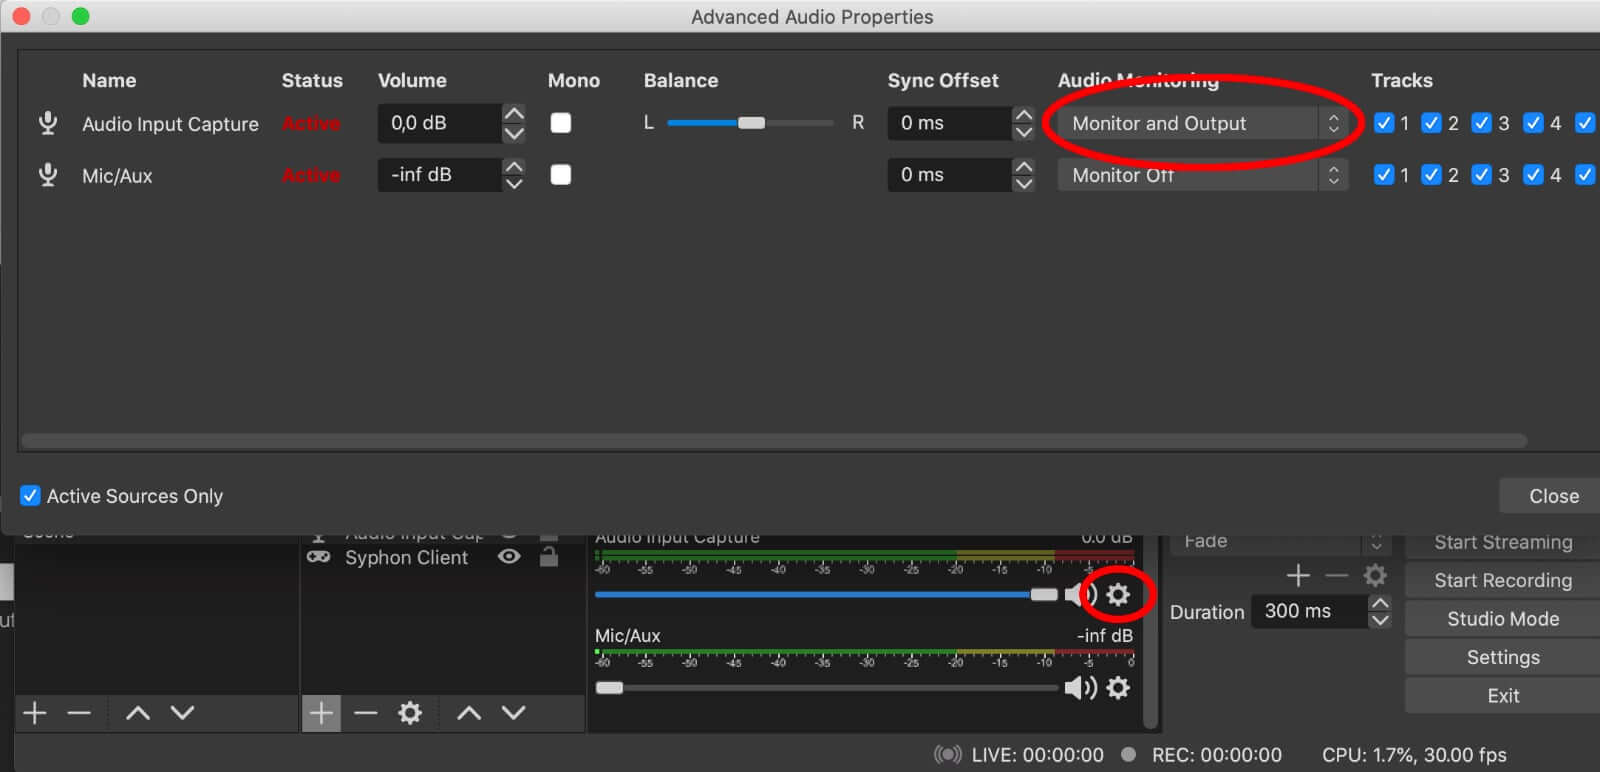
Tip: you can enable monitoring for our Audio Input by clicking on the gear icon below to the audio level meter, so you can hear to incoming audio.
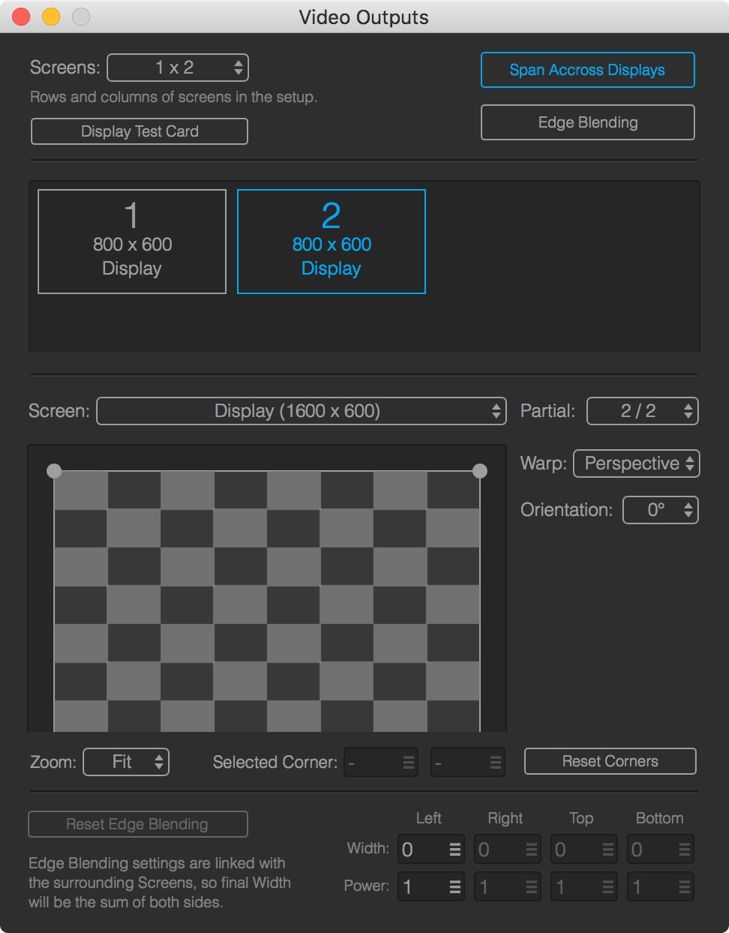
Setup a Matrox Dual/TripleHead2Go in Mitti is just a few click.
First, you need to create as many screen in the Video Output as you need - 2 for a DualHead2Go and 3 for a TripleHead2Go. Then you need to select the correct screen for each one from the Screen popup.
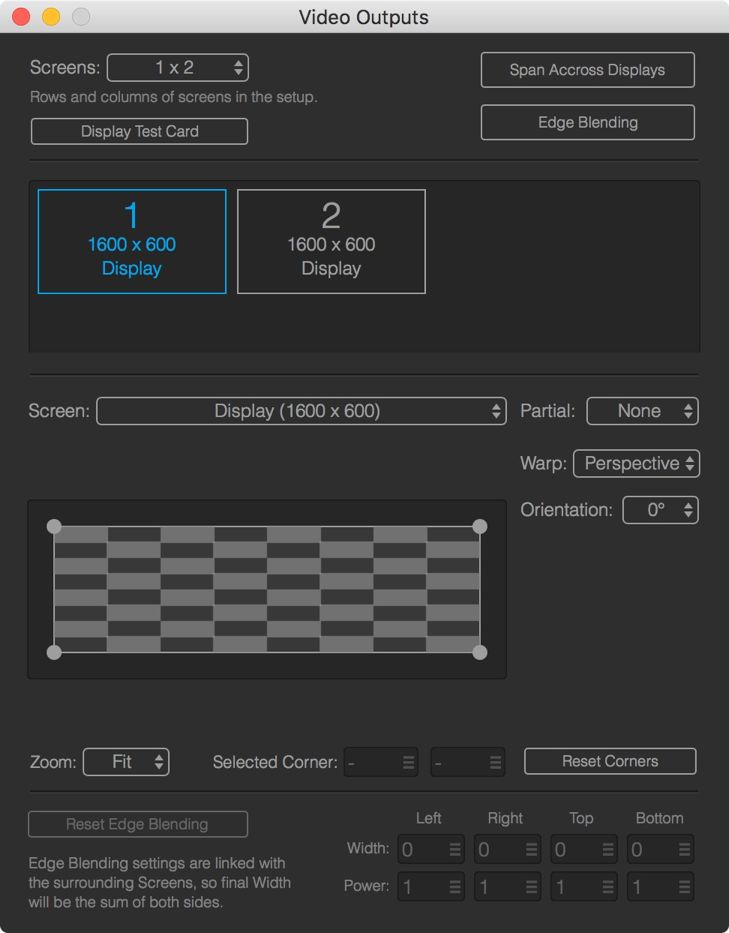
Set the Partial Screens from the Partial popup to split the output to 2 identical displays - with a Triplehead2Go you need to use 3 here.
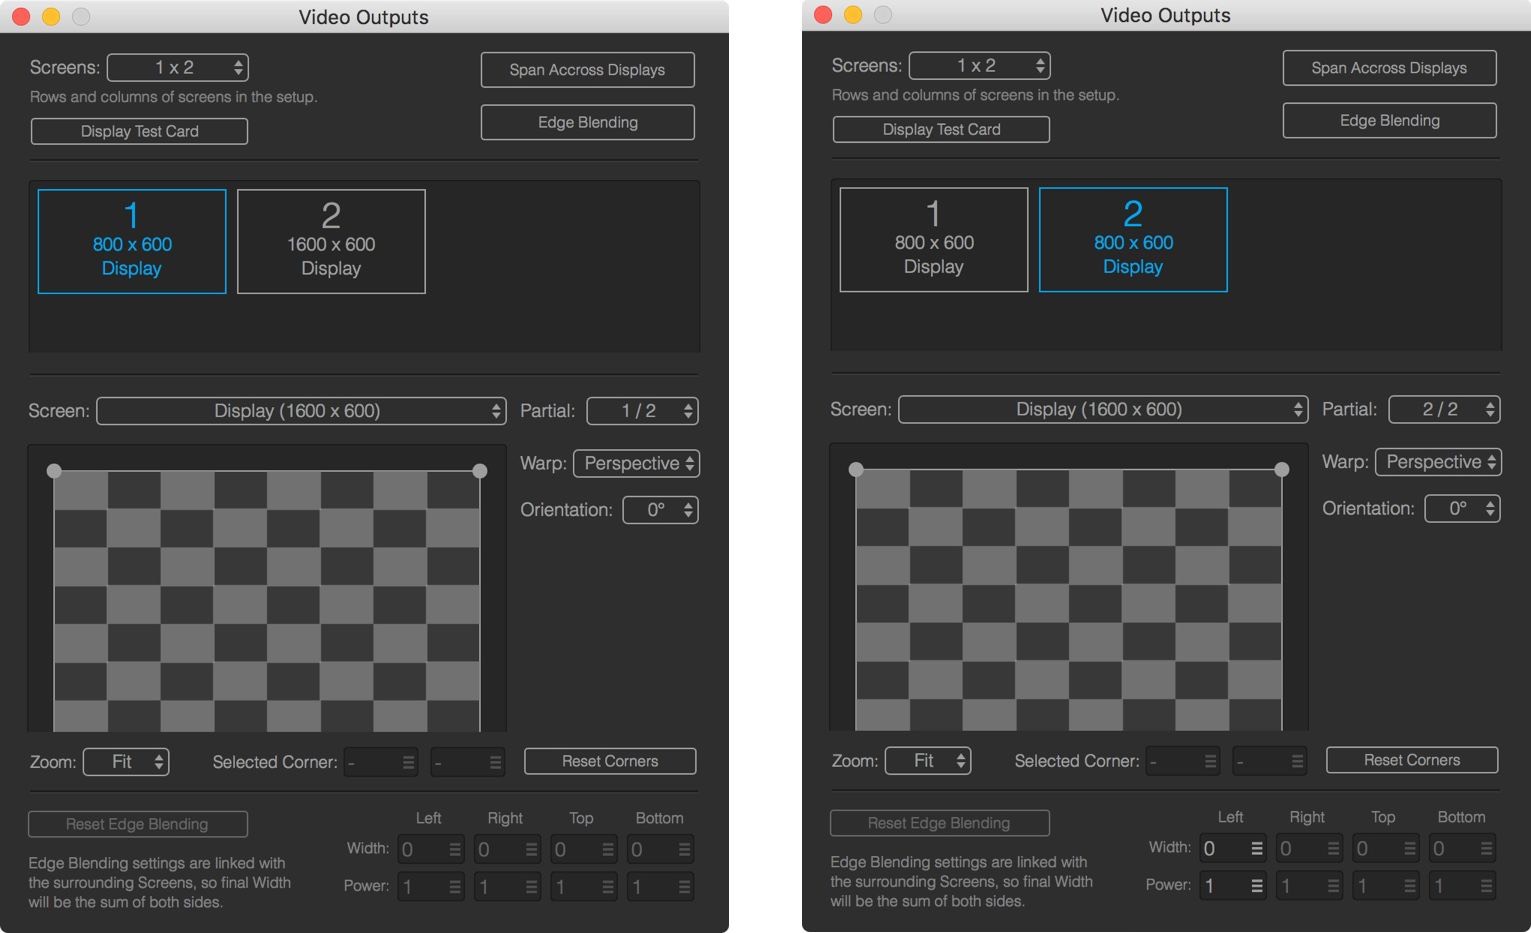
In case you are using super-wide content, you need to enable Span Across Displays to make the output spanned on the attached screens.
There are multiple ways to connect Mitti and Vezér. Vezér can send MMC commands and can generate MTC timecode, so both of those options can work. However, we are suggesting to use NMC instead, because that is the easiest option which also works on a network.

You can copy Cues from Mitti and than paste to Vezér to make Markers, nicely and easily.
Mitti can be driven by incoming MTC timecode. This screencast shows you how to setup the connection.
Mitti and Logic Pro X 10.3 can be setup with MMC connection to sync Logic's and Mitti's playhead on scrubbing on Logic's timeline.
Mitti can be driven by incoming MTC timecode. This screencast shows you how to setup the connection.
Still stuck? How can we help?