Welcome to Mitti! This article is an introduction to Mitti's basic principles and user interface.
When you open Mitti and create a new project, it presents you an empty Playlist with most of the controls disabled - since there are no Cues yet Mitti automatically disables non-relevant controls. So lets check out the major parts of the user interface now.
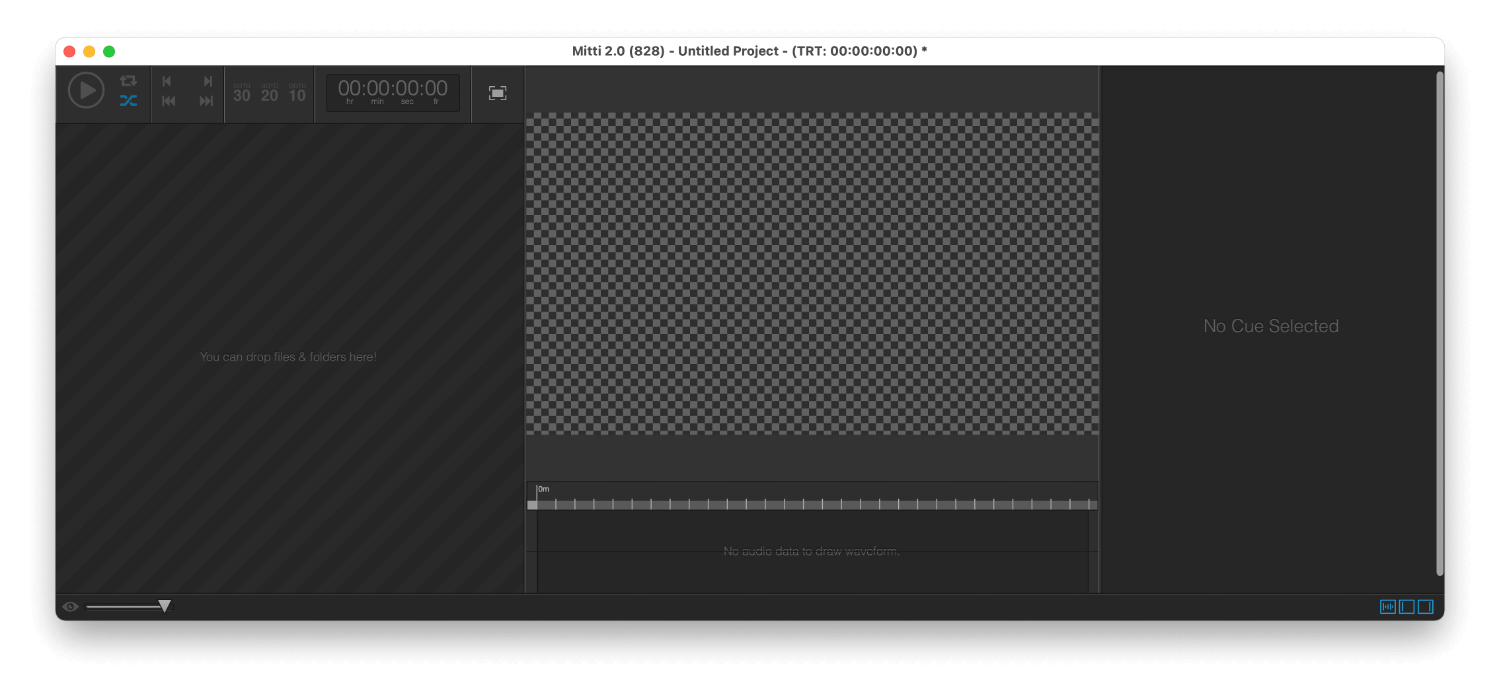
Mitti's Main Window is divided into three 3 parts:
Located at the left side of Mitti's Main Window, you can find the Transport Controls, Main Timecode Field and the Video Output Indicator.
The stripped area is the Playlist: this is the place for your Cues.
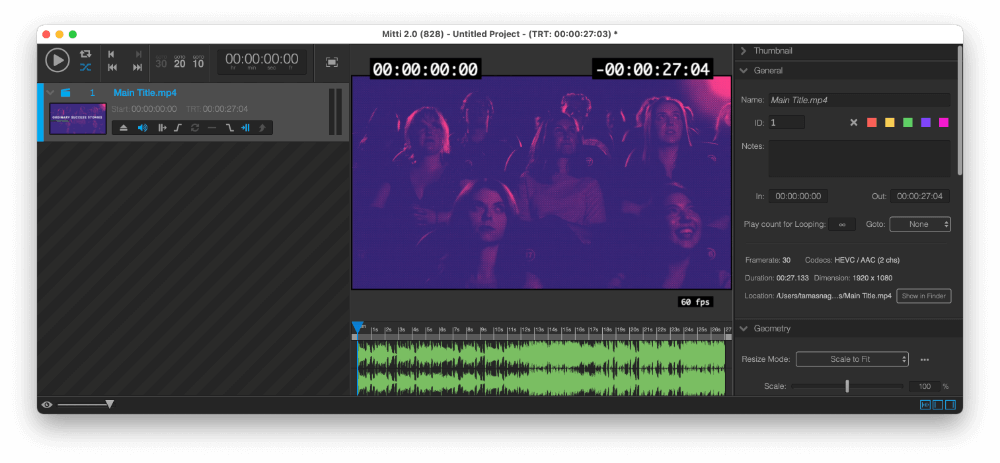
Located at the right side of Mitti's Main Window, the Preview displays the current Cue at the current timeline location.
The Preview Window also displays the Cue Time Overlays, which you can configure in Preferences-Overlays and toggle on/off from the View menu.
The Playhead is below the Preview, it should the In/Out points of the Current Cue - at the bottom of the Playhead view, there is the Audio Waveform.
On the right side of the interface, there is the Cue Inspector, which shows the settings of the Selected Cue. In case there are multiple items selected, it shows only the options available for each of them - modifying settings affects all selected Cues this case of course.
Located at the bottom of Mitti's Main Window, the Main Fader controls the overall opacity of the Playlist.
With the "Eye" icon on it's left side, you can trigger Auto Fading, which will fade-in or -out the Playlist during the Fade Time specified in Playlist settings. If you hold down the ALT key while clicking on this button, it will toggle the opacity on or off.
On the right side you can show or hide the Playlist & Transport or the Cue Inspector views.
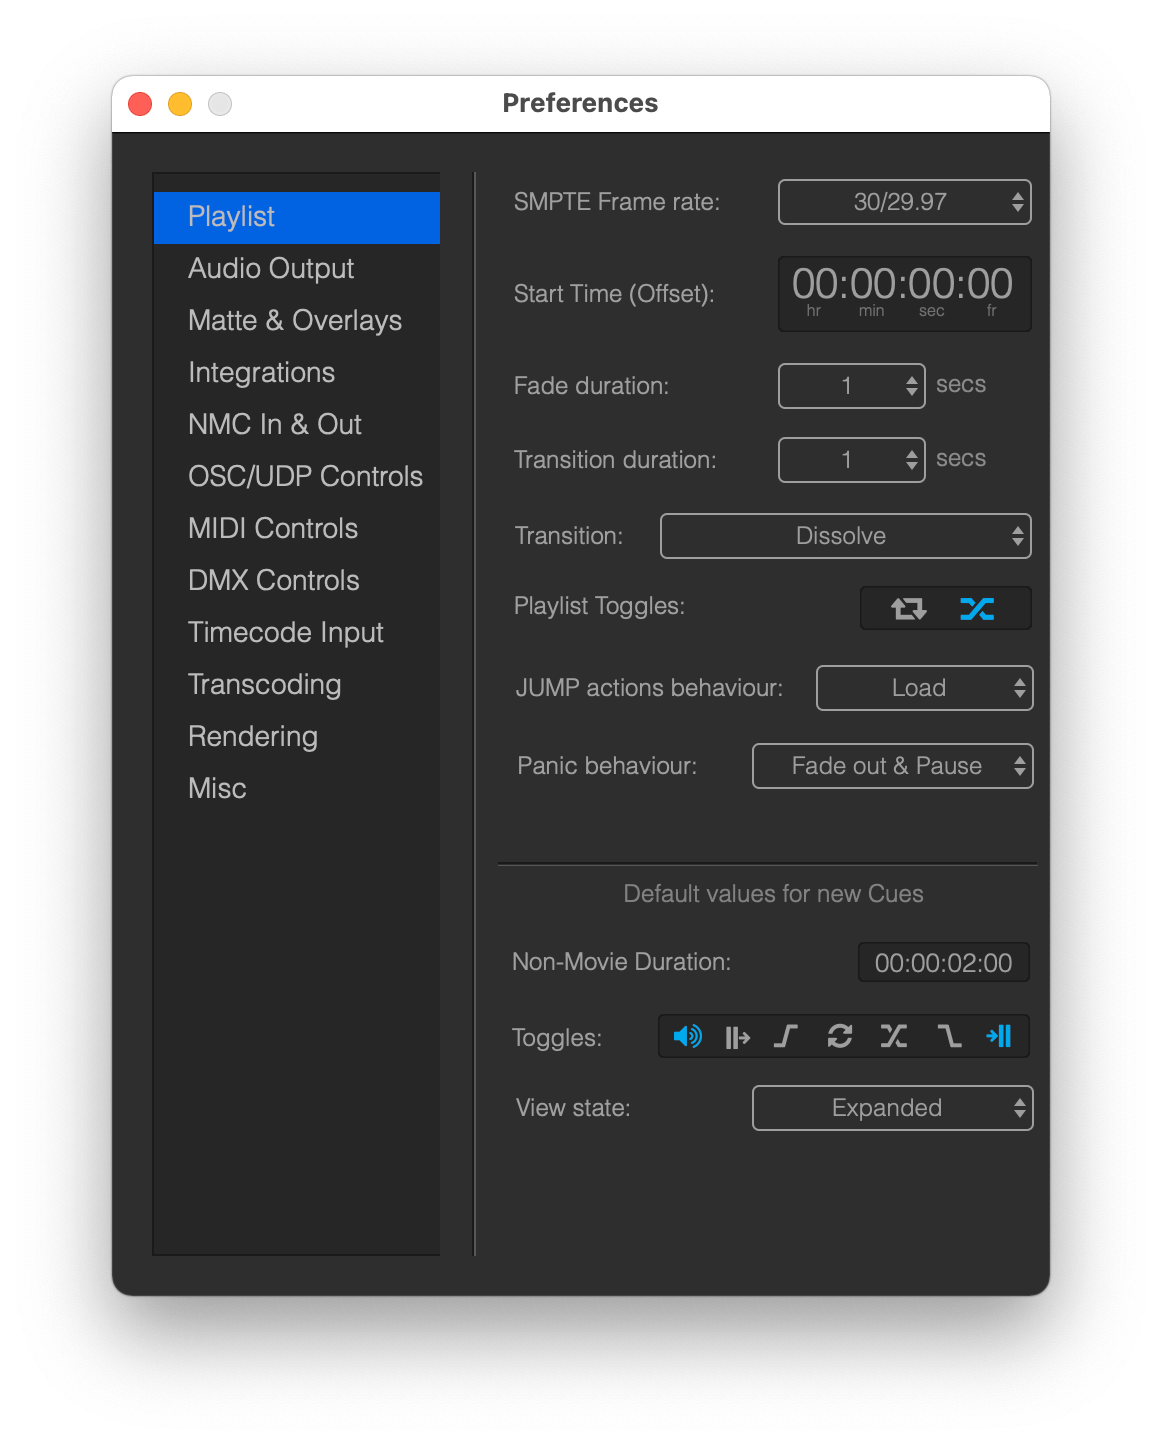
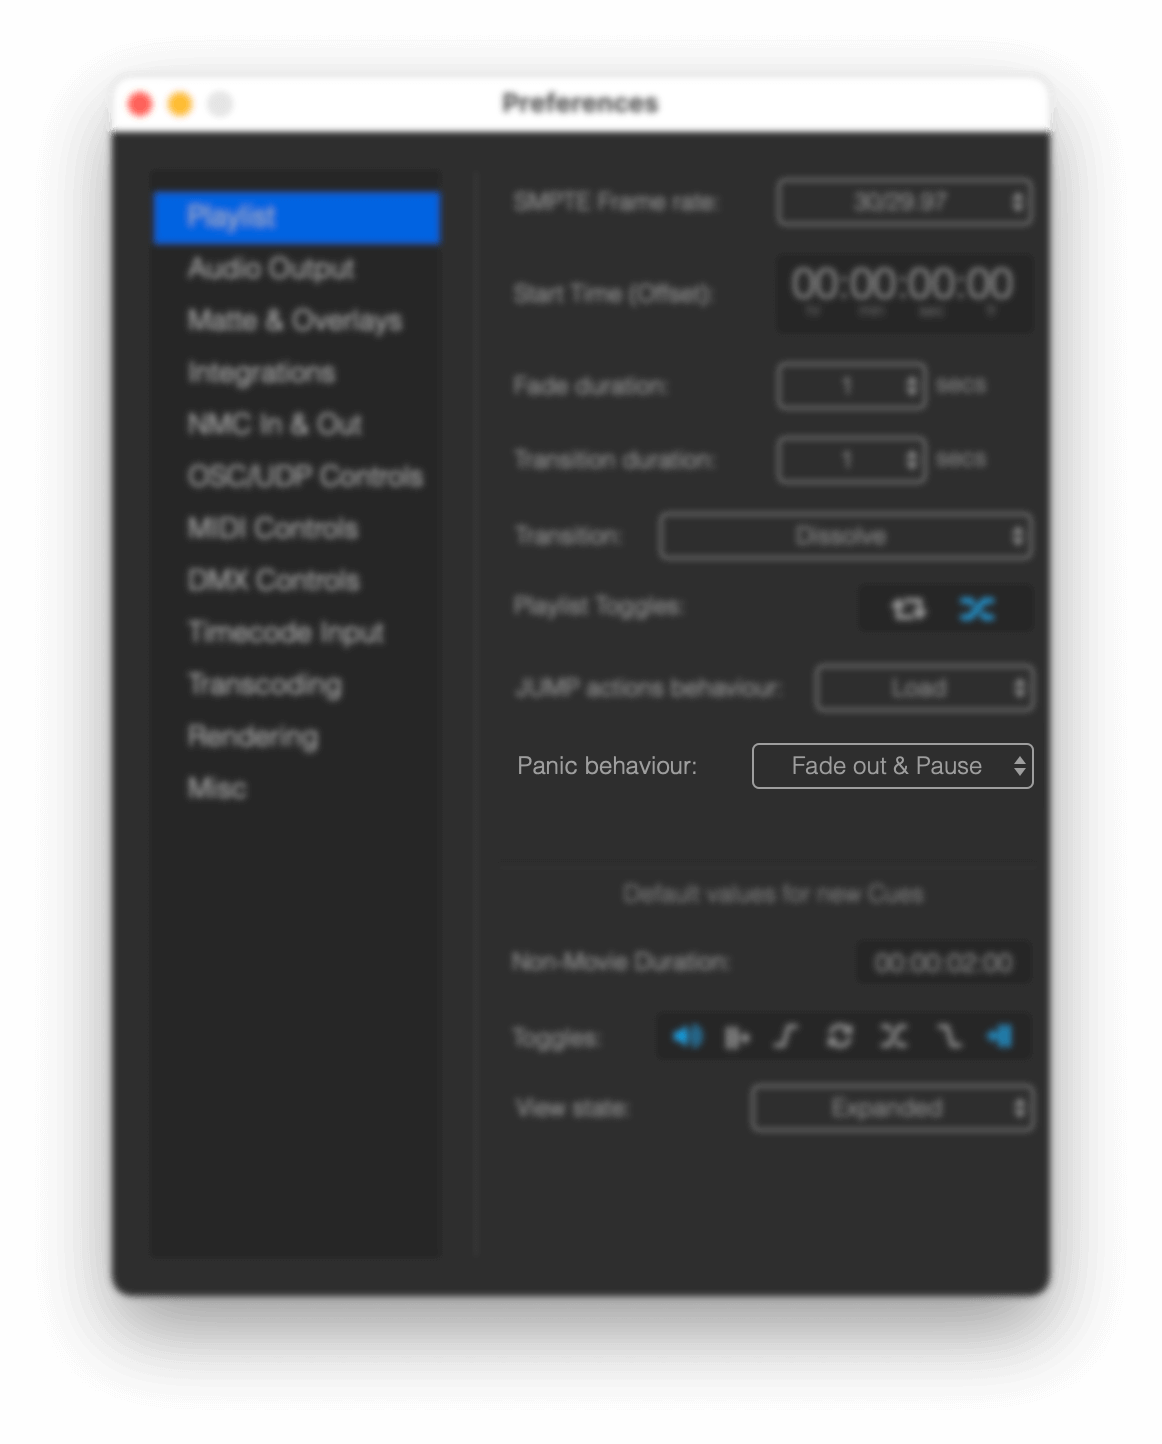
Time in Mitti represented as SMPTE time, so it always uses the hh:mm:ss:ff format. The Playlist can be, and must be configured in the Playlist Preferences to use one of the following frame rates: 24, 25, 30/29.97 - even if your movies has a different frame rate.
Mitti's internal timeline must be consecutive, which means Cues will be always consecutive, so no empty time are allowed between them. Mitti will manage that for you, so there are no things to do on your side. Whenever you are creating a new Cue, that will be added after the last one.
You can set the Start Time of the Playlist as well, and this setting will be also applied as the timecode offset if Mitti is following external timecode.
You can also specify the duration of Cue Fades, non-movie Cue duration, default state of Playlist Looping and Transition on Play, behaviour of JUMP and Panic actions as well as default Cue states.
There are multiple ways to create Cues in Mitti. Video, Still Image and Audio Cues can be created by simply drag-n-dropping files from Finder to Mitti's Playlist view, while Syphon, Camera and NDI Cues types are only accessible from the File... Menu. Once you created a Cue it will be added to the Playlist.
You can expand or collapse Cues with the grey triangle on their left side, or by selecting one or multiple and hit CMD+U.
Once you have multiple Cues you can set the Current Cue, and also remove or re-order Cues when needed.
Each Cue has its own Preferences, such as Color Controls, Source, Transition and so on.
You can read about Cues in-depth in the Cues Section.
Once you finished setup of your Cues you can start playback - either using Mitti's Standalone mode or even MTC/LTC timecode driven. These modes are available from the Playlist... Menu.
During Playback, you cannot create new Cues from the File menu - drag & drop from Finder still works - or remove existing ones.
Standalone Playback means Mitti will use its internal timeclock to manage playback. There are 2 additional options available when you use this mode - either by the icon next to the Play button or from the Playlist... menu:
You can define the default states of these options in the Playlist Preferences:
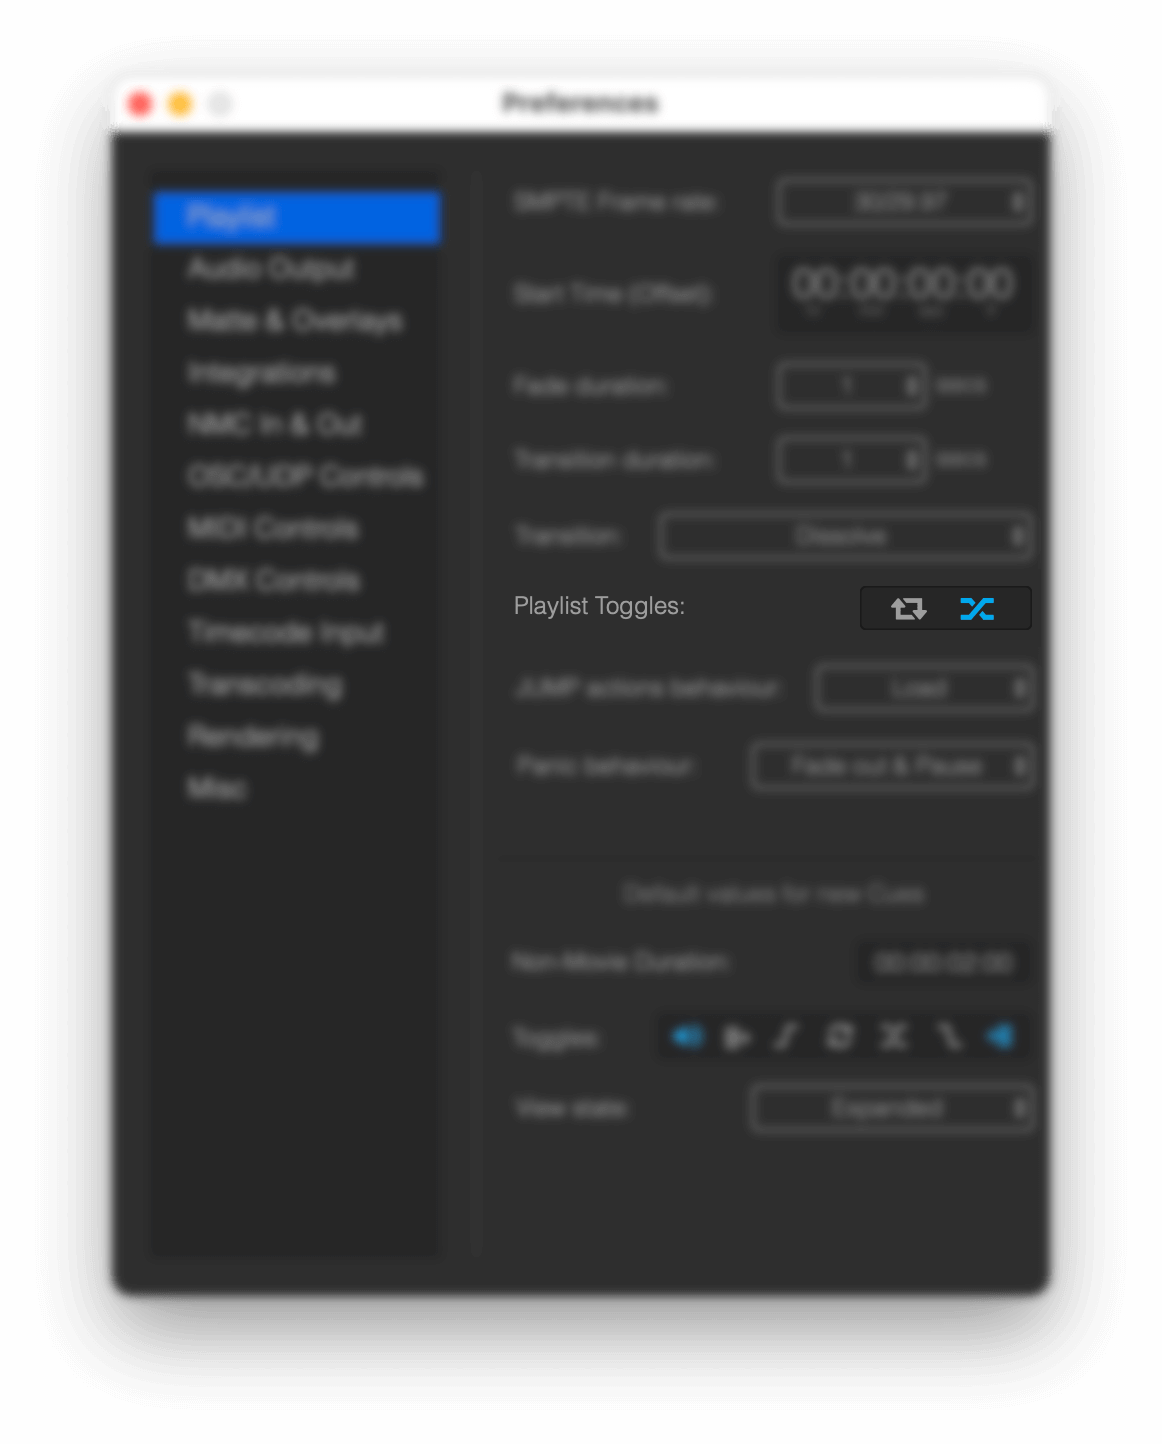
The Transition on Play Selected Cue... function always using the target Cue's transition settings.
You can start and pause playback with SPACEBAR , while hitting ENTER will switch to and Play Selected Cue.
With the JUMP command you can switch to a specific Cue, and you can define what Mitti should do after the switch: either standby, or start playback of that Cue.
You can define the following behaviours in the Playlist Preferences:

The following JUMP commands are available from the Playlist... menu:
CMD+DOWN ARROWCMD+UP ARROWALT+UP ARROWALT+DOWN ARROWSHIFT+ENTERIn case you need to "kill" the outgoing signal, there is an action called Panic - available from the Playlist... menu or by hitting CMD+ESC.
You can define the following behaviours in the Playlist Preferences:
The playback can follow an external MTC or LTC timecode source, and there is an article dedicated to this topic -you can find it here.
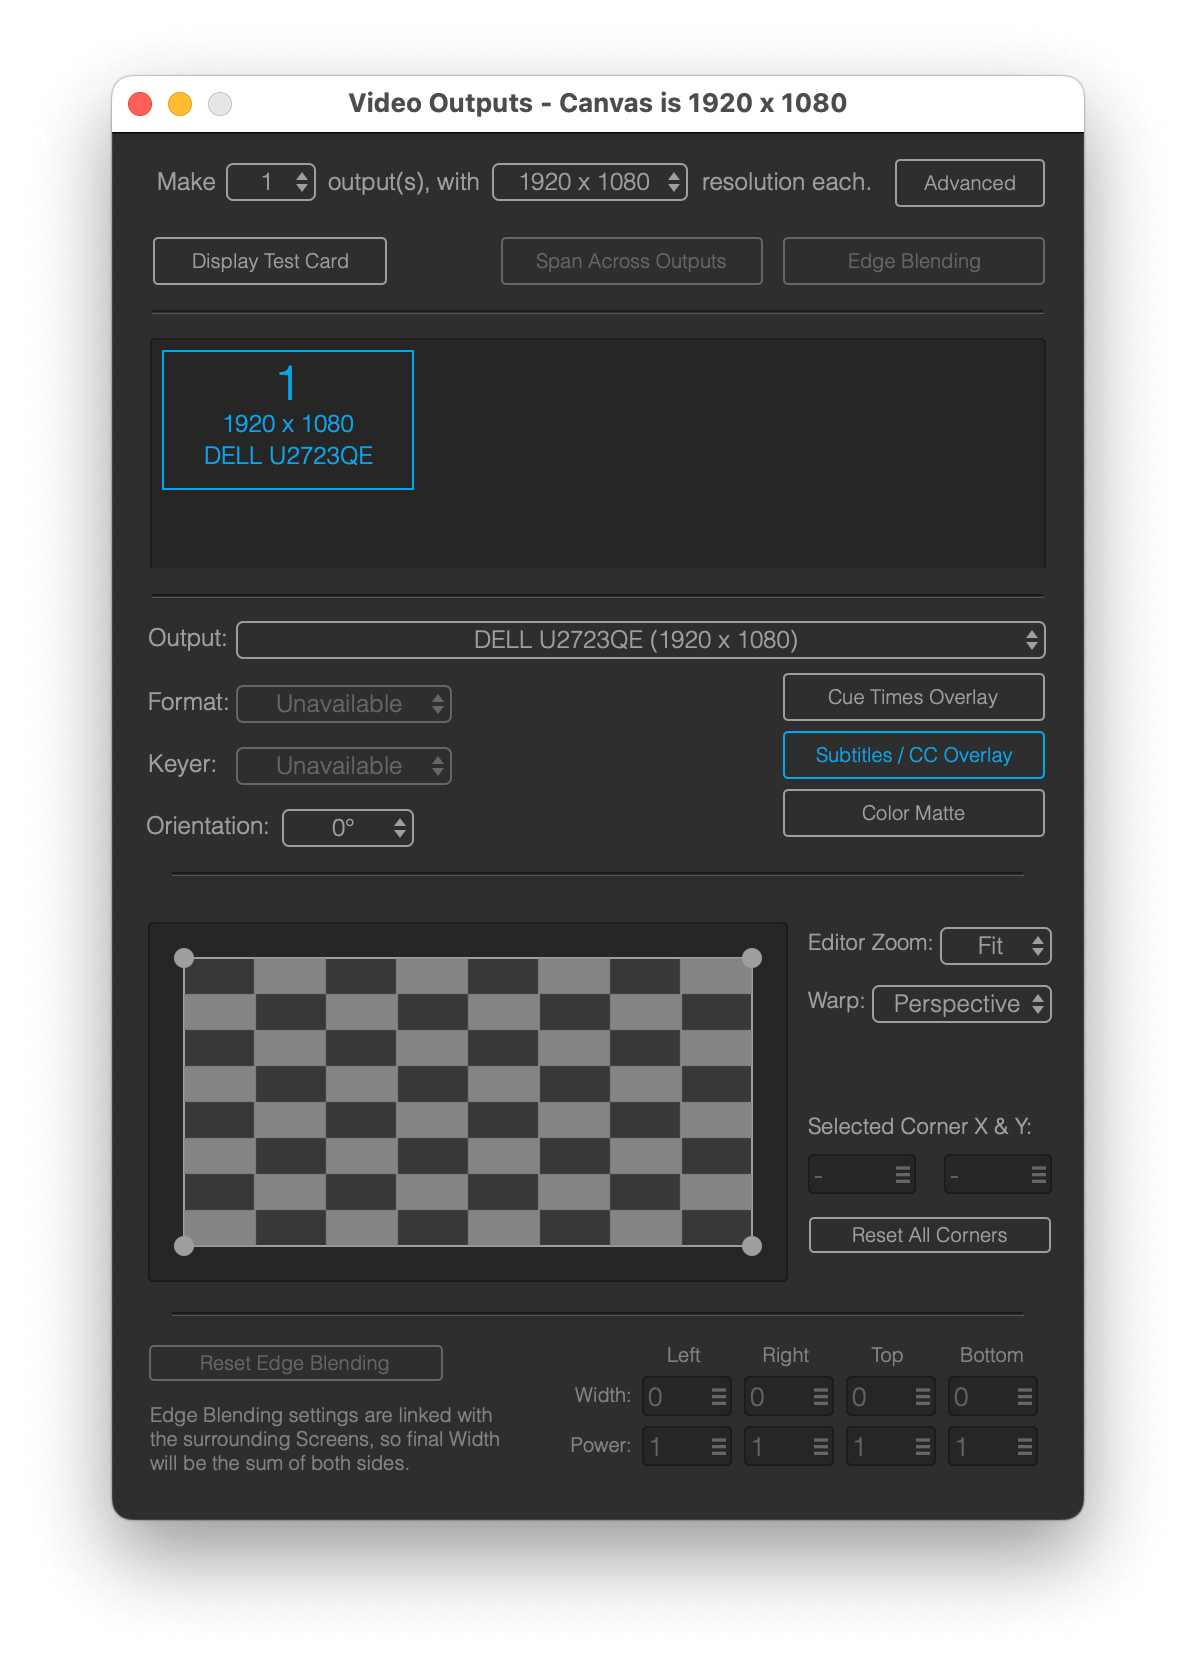
Mitti supports video output on multiple displays, Blackmagic Decklink & UltraStudio devices, NDI and Syphon - you can read more about this in the Video Output section.
Mitti can be remote controlled in various ways, depending on your workflow - it integrates with your ATEM switcher or NDI receiver, and you can also control it with OSC - Companion is a great example of that.
Still stuck? How can we help?