
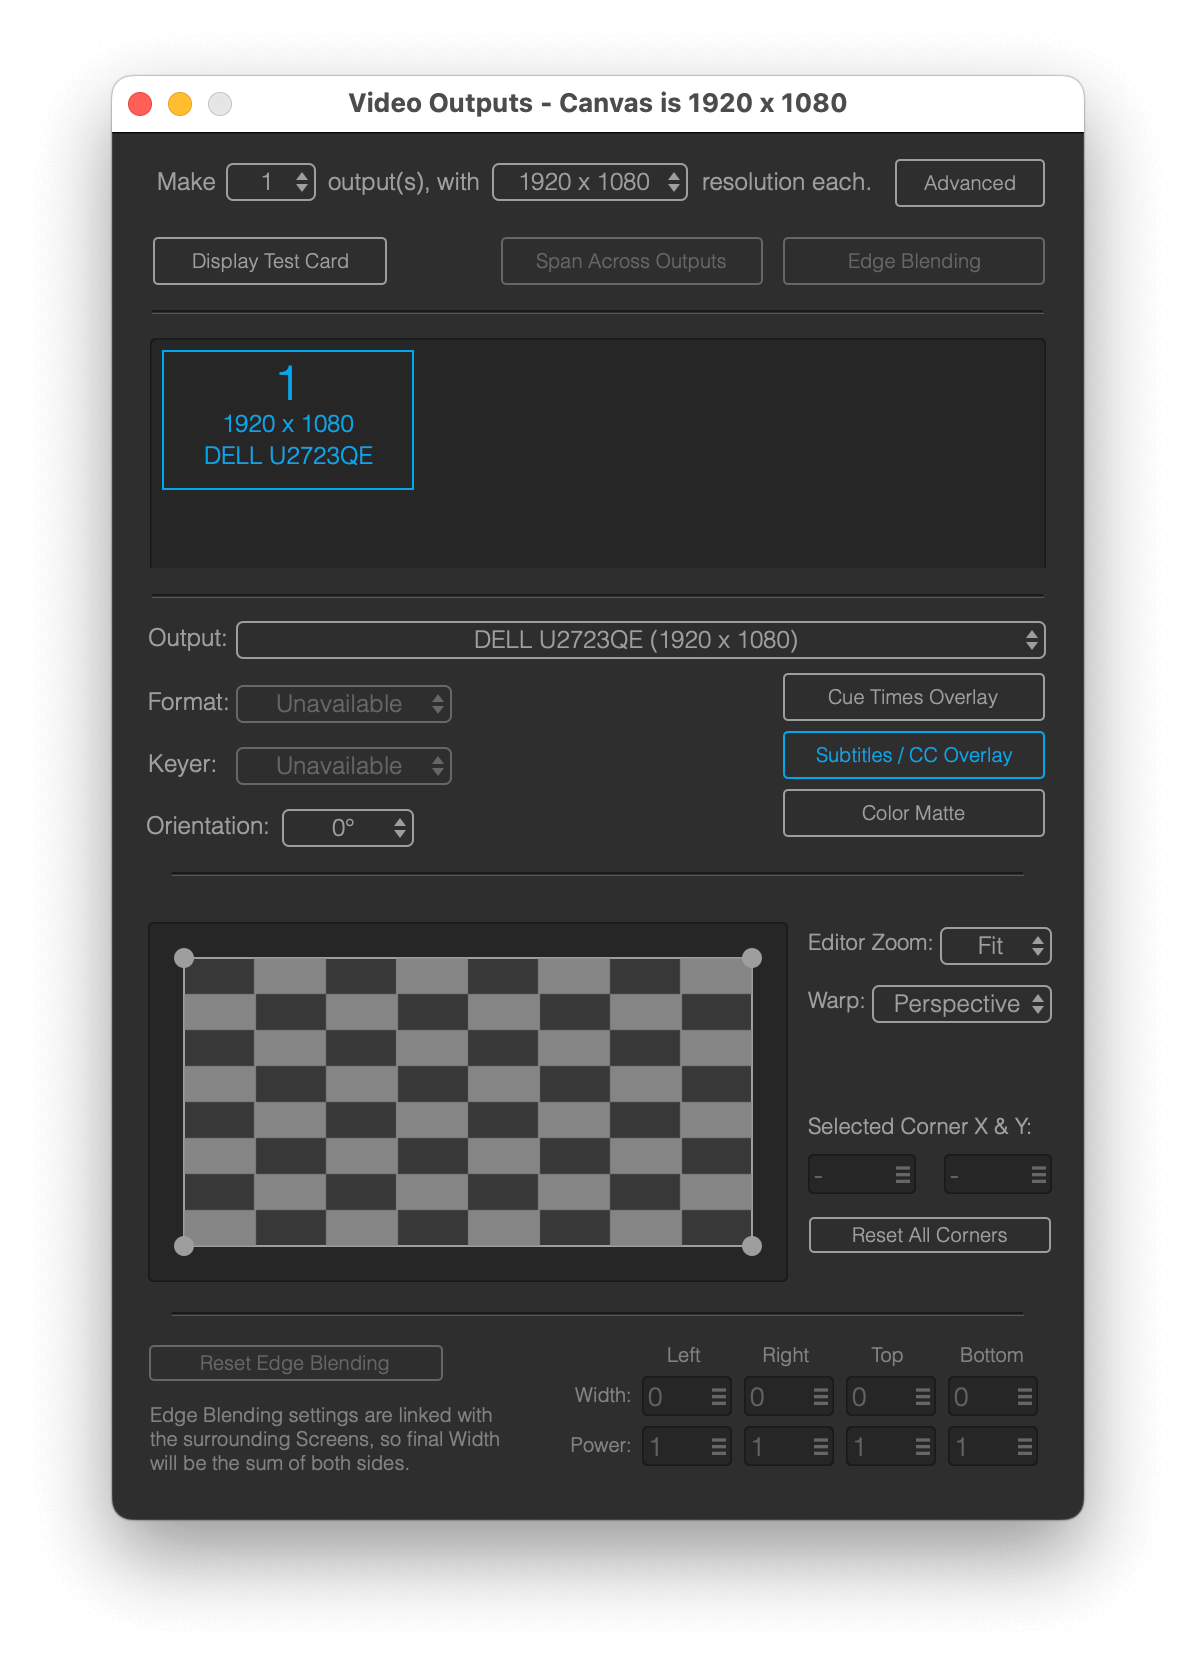
Mitti supports output on multiple displays, Blackmagic Decklink & UltraStudio cards, NDI and Syphon, even with Corner Pinning, Edge Blending, Timecode Overlays or Color Matte applied. You can find the Video Output Window in the Output menu. This window is where you can setup the Outputs, and there should be always at least one screen added where Mitti can render content in fullscreen.
To toggle activate rendering on Outputs on/off, you can use CDM+F key combination or there is also a menu item in the Output menu.
You can turn on the Video Output automatically after a project loaded from within Mitti’s Preferences - Misc menu: Activate Output on Open
The Video Output Window consists of 3 parts, discussed in more detail below:
- Screens Setup
- Screens View
- Screen Settings
Screens Setup
The top part of the Video Output Window is where you can setup the key parts of your screens setup. A screen setup in Mitti is defined by number of outputs - rows and columns of outputs, which is often represents how you place projectors and other displays physically, and also related to how Mitti will span content between displays and projectors if needed.
Once you set the number of outputs, you need to set their rendering resolution - Mitti will render all outputs and this resolution, called as "Canvas".
Screens
You can set the number of screens you want to use by either selecting an existing value from the popup, or by clicking the Advanced button you can set number of rows and columns of screens.
Resolution
You can select a predefined rendering resolution from the popup, or set a custom resolution by clicking on the Advanced button.
If the rendering resolution differs from the resolution of your output (a projector, for example), Mitti will try to fit on the output.
Display Test Card
When enabled, Mitti will displays a Test Card on all video output displays which could be useful setting warping, edge blending and identify outputs.
Span Across Displays
By default Mitti duplicates to video content to all displays, but if you enable the Span Across Displays option, instead of duplication the content Mitti will span that across displays. This is the setting you should turn on if you are working with double/triple or super-wide(-height) content.
You can check how the Canvas resolution is changing on the titlebar of the window.
Edge Blending
With edge blending you can combine multiple video output to make one perfectly a single seamless image. Toggling on the Edge Blending Button won't has any effect however, its just enable you to use the screen-level edge blending settings.
Outputs View
The Outputs View displays the screen object in your setup, and also gives you info about the layout of the screens as well as screen number and the resolution info. There should be always a Current Output, which is drawn by blue and you can select it using your mouse or trackpad.
Output Settings
The Output Settings is where you get finer controls for the Current Output and apply settings like warping and overlays.
Output
You can select the corresponding screen with this popup. It can be
- an external screen,
- a Blackmagic Decklink or UltraStudio card that supports outputs,
- NDI™, or
- Syphon.
Format
If the output is Blackmagic, you can set the output frame rate here.
If the output is NDI, you can set the output frame rate and pixel format (YUV or RGBA) here. If you want to maintain transparent areas, you should choose an RGBA pixel format.
Keyer
Mitti's Blackmagic Output also supports the device's built-in keyer if present, so with the appropriate hardware you can play out graphics and overlays including an alpha channel (called key and fill signals), or superimpose the graphics over the incoming signal.
With multi channel output gear like the Ultrastudio 4K or Decklink Quad that have built-in keyer, you can set the Keying: mode to External in Mitti's Blackmagic Output Preferences to send two signals on two SDI outputs: one for fill, one for key.
With Keying: mode set to Internal the appropriate Blackmagic output gear like the Ultrastudio 4K will superimpose the graphics over the incoming signal.
Please note that transmitting to Blackmagic devices has not the same performance than a native video output from your graphics card (GPU), so that can result in increased latency and higher CPU usage.
Orientation
The orientation of the screen, you can rotate the final output by 90, 180 or 270 here.
Time Overlays
You can enable Time Overlays on Outputs, just like on the Preview.
Subtitles / Closed Captions
You can enable rendering of Subtitles & Closed Captions (if there are any) on the selected output.
Color Matte
You can display the Matte Color set in Preferences on transparent areas when rendering to the output. This feature is useful when you want to mark transparent areas, so you can use a chroma keyer to remove them in your switcher.
Warp View
With the Warp View you can apply corner pinning - aka quad-warping - for the Current Screen, by dragging one of the four corner points. Mitti showing a checkerboard image here to represent the output within the screen bounds.
Warp
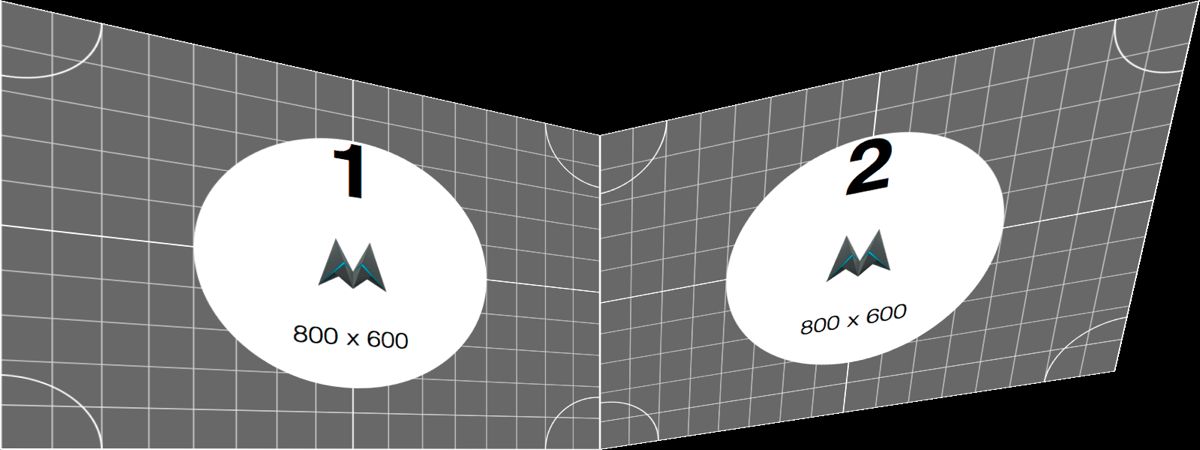
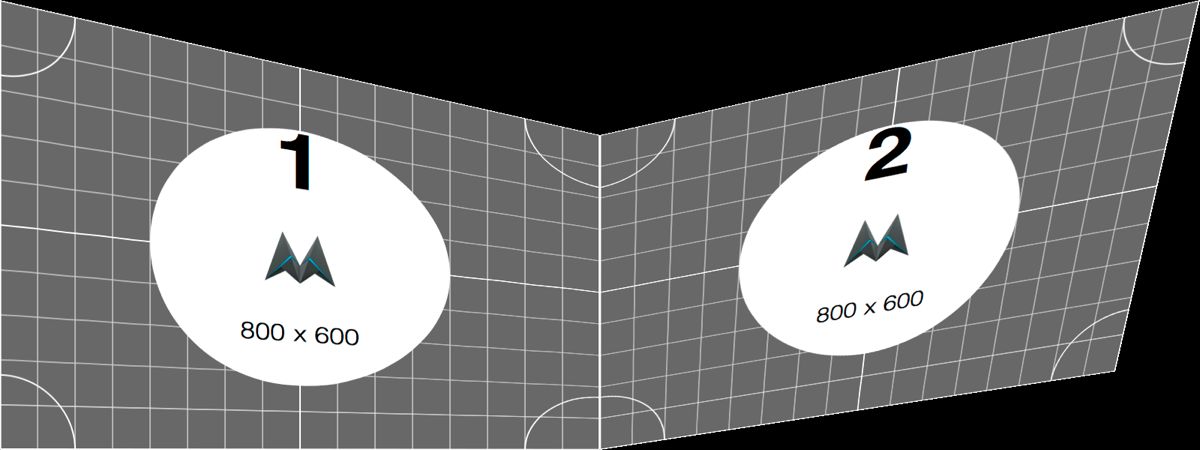
Mitti supports Linear and Perspective warping and with the Warp popup you can select which one to use for the Current Screen.
Perspective warping - the default mode - guarantees perspective-correctness, which is useful in the most cases, but cannot guarantee continuity because of the perspective-correctness applied, which could be problematic with edge blending.
Linear warping guarantees a continuous image across a split, but since it is not perspective-correct, it may distort images if higher warping applied.
Zoom
The zoom ratio of the Warp View.
Selected Corner
You can move the selected corner point here, by either setting pixel coordinates manually or by dragging the field's right side.
Edge Blending
With the Edge Blending settings you can specify overlapping in pixel values as well as power - gamma correction - on each side of the screen that has an other screen surrounding.